Thursday, December 6, 2007

Quick Thai Fix

I am first to admit that I am not a good cook, especially in the sense of creating all my recipes from scratch. I also know I am TERRIBLE at recipes and I'm not sure why. Whether I follow the directions exactly (as I do with baking) or if I improvise just a little to adjust to my own palate, it never comes out quite like I wanted it. I could be too hard on myself or I could just be a bad cook. Either way, I will take the easy way out if I can. Although I am not a huge fan of Food Network's Sandra Lee or Rachel Ray (even if she doesn't annoy me as much as some), I fully am aware that I cook very similarly- "semi-homemade" meals cooked in "thirty minutes." One of my latest and greatest finds is a delicious Pad Thai sauce that is almost ready to go. Pad Thai is one of those dishes I actually crave. I love the sweet and sourness of the sauce, the texture of the noodles...it's just so good. When I went to our local Asian market to get the ingredients to attempt Pad Thai from scratch, I came across this bottle of sauce. There aren't any preservatives or high fructose corn syrup- just half the ingredients that was on my recipe list! What a deal! Instead of buying several items all I needed to buy was just one bottle! Fortunately, it has cured several cravings and will definitely be a staple in my kitchen.


Easy-Peasy Pad Thai

1 bag of rice noodles (medium width)
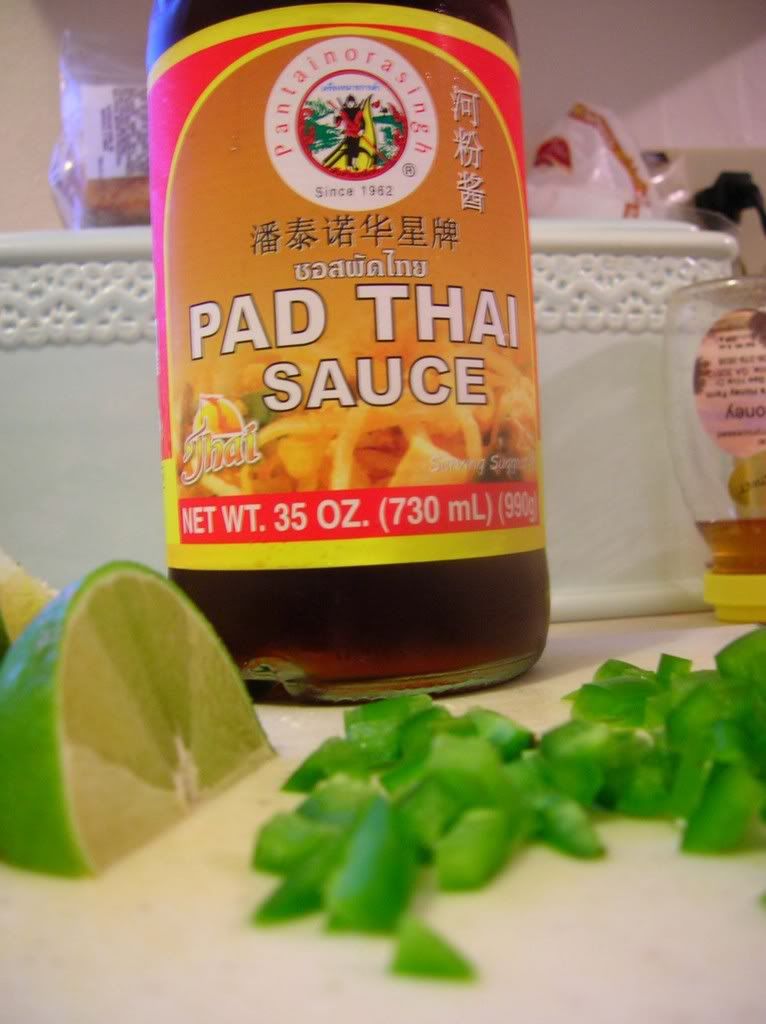
1 bottle of Pad Thai sauce
1 small red or green jalapeno pepper (seeded and minced)
1 cup crushed peanuts (roasted and salted)
1-2 cups diced tofu (you can used cooked chicken or shrimp too)
1 cup fresh bean sprouts
1 egg (beaten)
1 tbsp minced garlic
olive oil
lime wedges
chopped cilantro

Cook rice noodles as directed. You normally would flash cook them in some boiling water. They cook REALLY fast, so keep an eye on them. They usually only take about 1-2 minutes- any longer they'll get too mushy. You want to be sure they are cooked about 2/3 of the way since you'll finish cooking them in the sauce.

For the sauce: In a wok or large pan, saute garlic, red jalapeno, and tofu (or chicken or shrimp) in olive oil until tofu is slightly browned. Move to the side of the wok and add egg. Scramble apart from the tofu. Once cooked mix together. Add cooked noodles with as much sauce as you like (usually about 1/2 -2/3 cup for a whole bag of noodles). Stir fry together until everything is mixed and covered in sauce. Serve with a sprinkle of crushed peanuts, chopped cilantro, bean sprouts, and a lime wedge to squeeze on top. (OPTIONAL: I usually add in a some mixed frozen veggies that I've cooked separate.)

Friday, November 30, 2007

Little Bites

I will admit that I have a sweet tooth. I love all sorts of sweets, especially right after dinner when you just need a little something. I am very good at only having a small amount and savoring every bite. I've been that way since I was a child. A bag of gummy bears or a candy bar can last a few weeks. And a bag of cookies? They usually go stale before I even get finished with it. Speaking of cookies- they have to be one of my favorite after dinner deserts since they are already in "little" amounts for you. I've had a craving for the cookies below for a while. I've actually never baked thumb print cookies, but I love shortbread-like ones with jam filled in the middle. The recipe I found for these cookies were not bad- not great, but not bad. They seemed to fall a bit flat and I'm not sure if it just needs a bit of citrus (lemon zest? Squirt of orange juice?), a pinch of salt, or maybe both. Also, my cookies did not look ANYTHING like the picture in the blog (Really...when does it ever?) and the dough came out really crumbly making it challenging to work with it. However, they soothed the craving and the hazelnuts did add a nice touch.


Thumbprint Cookies
*from Cafe Fernando
Makes 25 cookies

1 cup flour
1/2 cup ground hazelnuts (1 cup as whole)
4 oz butter, at room temperature
1/4 cup sugar
1/3 cup raspberry jam or 1/3 cup apricot jam (I actually used cherry and it was WONDERFUL!) (*I would add a pinch of salt and maybe some lemon or orange zest)

Preheat your oven to 350 F. Line two baking sheets with parchment paper and set aside. Cream butter with sugar until light and fluffy (5 minutes). Whisk together flour and ground hazelnuts and add to the creamed butter. Mix until well combined. Refrigerate the dough for 30 minutes (it will be easier to shape). Take a teaspoonful of dough in your hand, form a small ball, press in the center with your finger to make a hole (not all the way) and arrange on baking trays 2 inches apart. (Don’t be tempted to make them bigger than a teaspoonful). Bake for 15 minutes, until the edges are slightly colored. Let the cookies cool and fill the holes with your favorite jams.

Thursday, November 29, 2007

Thanksgiving Leftover Solution #2

I'm slowly starting to catch up with life and therefore have some time to put up another post. Since I'm behind posting my recipes, I'll have to back up a few weeks. This recipe was actually made two weeks prior to Thanksgiving because that is when I had Thanksgiving dinner with my family. We had so much turkey and veggies leftover! I'm not much of a "stew" person. However, to use up some leftover Thanksgiving ingredients, I threw everything into a pot to make this lovely dish. It was really more of a "stoup" (yes, a Rachel Ray term)- meaning it was thicker than a soup and a bit thinner than a stew. It is perfect for the after holiday stress!


Leftover Thanksgiving Stew

Batches of leftover turkey (I leave it up to you to figure out how much you want to eat)
1 small onion (chopped into rustic chunks)
2 cloves garlic (minced)
2 carrots (chopped into rustic chunks)
2 celery stalks (chopped into rustic chunks)
1 cup frozen peas
about 1-2 tbsp of poultry seasoning
2-3 cups of chicken broth (depending on how thin or thick you want it)
2 tbsp butter
3-4 tbsp flour (depending on how thin or thick you want it)
1 medium can of diced tomatoes (with garlic and basil)
**This stew isn't very precise in it's ingredients since it really is a matter of preference.

Saute on medium heat the onion, garlic, carrots, and celery with butter until browned and semi-tender. Add in the flour and brown until it absorbs some of the butter. Add chicken broth and poultry seasoning. Bring to a boil then reduce heat to medium low. Add in turkey and can of diced tomatoes. Reduce heat to low and cook for about 30 minutes until flavors have melded together. If you find that the stew needs to be thicker, you can add more flour or add some leftover gravy. Add frozen peas and cook for another 5 minutes (until peas are heated through). Serve on top leftover mashed potatoes and/or stuffing.

Wednesday, November 21, 2007

Thanksgiving Leftover Solution #1

Okay, so I'm back. Well, not in full force as I intended, but I have been cooking. I thought this week I would post several leftover solutions that are just as yummy as the original dishes. A and I are really good at reinventing leftovers and we've been doing that for the past few days. Last night, we kicked off the holidays with a Thanksgiving style BBQ. What was the highlight you ask? It was Thanksgiving Feast Turkey Burgers with mashed sweet potatoes. This is a great recipe to use up leftover Thanksgiving stuffing and cranberry sauce, and it was mighty delicious too! (No picture for this one since we "gobbled" them up!)

Thanksgiving Feast Turkey Burgers with Cranberry Sauce

1 pound ground turkey
about 2 cups of leftover Thanksgiving stuffing (mine had apples, sausage, and walnuts!)
1 egg
1 tsp poultry seasoning
1 tbsp steak seasoning mix (if you have it on hand...if not, just add a touch of garlic powder and onion powder)
2-3 splashes of worcestershire sauce
a few dashes of salt and pepper

Form into burgers and grill them up. Top with cranberry sauce, lettuce, onion, and serve...trust me, sooooo good! For the more daring- top with mashed sweet potatoes so you have them IN your burger.

Friday, November 16, 2007

Small Break

Yes, taking a small break from cooking. I think Thanksgiving has wiped me out! I will be back in full strength next week since, although Thanksgiving, I'll have more time to cook! I'm already thinking of what to make next...


*this year's Thanksgiving feast

Tuesday, November 6, 2007

I Heart Pumpkin (Cheesecake)

My early Thanksgiving adventure came and left. Now we are stuck with the best part of it all...the Thanksgiving leftovers! Since Friday, I've had so much turkey, stuffing, mashed potatoes, etc. I love it! Well, I was able to top last Thanksgiving (in my opinion, at least) but was not able to make the pumpkin pie I intended. Unfortunately, the grocery store I went to did not have half the ingredients I needed and I didn't feel like improvising. So instead of pumpkin pie, I made a very delectable bourbon pumpkin cheesecake. As I've stated before, pumpkin is one of the things I very rarely eat in any form. However, this pumpkin cheesecake was wonderful and since I made two (completely by accident) I have been having slice after slice. I followed the recipe below (for the most part) and ended up with two cheesecakes because the pie crusts I bought were very shallow. If you make your own crust, just be sure you make it deep enough. Also, instead of sugar, I substituted Splenda.


Bourbon Pumpkin Cheesecake

Filling:
2 8-oz. packages cream cheese, softened (I used one package light, one package of honey nut)
1 1/4 cups sugar (or Splenda)
1 15-oz. can pure pumpkin puree, (if you use pumpkin-pie mix, don’t add dry spices below)
3/4 cup light sour cream
2 tablespoons bourbon
2 teaspoons vanilla extract
1 teaspoon ground cinnamon
1/2 teaspoon ground allspice
1/4 teaspoon salt
4 large eggs

Crust:
I used a package of Pillsbury ready pie crust in the freezer section of the grocery store to save time. A homemade graham cracker crust would be wonderful with this!

In large bowl, with mixer at medium speed, beat cream cheese until smooth. Then slowly beat in sugar until blended, about 1 minute, scraping bowl often with rubber spatula. With mixer at low speed, beat in pumpkin, sour cream, bourbon, vanilla, cinnamon, allspice, and salt. Add eggs, 1 at a time, beating just until blended after each addition.

Pour pumpkin mixture into pie crust and place in large roasting pan. Place pan on oven rack. Carefully pour enough boiling water into pan to come 1 inch up side of spring form pan. Bake cheesecake 1 hour 10 minutes or until center barely jiggles.

Remove cheesecake from water bath to wire rack; discard foil. With small knife, loosen cheesecake from side of pan to help prevent cracking during cooling. Cool cheesecake completely. Cover and refrigerate cheesecake at least 6 hours or overnight, until well chilled. Remove side of pan to serve. Garnish with whipped cream and roasted pecans.

Thursday, November 1, 2007

Getting Ready for Thanksgiving

I know it is only the first weekend in November, but I am (and have been for the past two weeks now) preparing what will be our family's Thanksgiving feast. My brother J will be in town for "Thanksgiving" this weekend (actual Thanksgiving weekend was too expensive to fly), and thus I am expected to pull together turkey and all. Last year's Thanksgiving was amazing- yes, I will fully pat myself on the back for it since I think I did a rockin' turkey. All my side dishes came out perfect too! The only thing I didn't do last year- the pumpkin cheesecake. That was from the Cheesecake Factory. This year, I am determined to trump last year's feast. AND, what will help, is that this year I am making the dessert- pumpkin pie with crunchy cranberry topping. My mouth is watering already....so, Thanksgiving recipes to come soon!


Last year's Thanksgiving

Friday, October 26, 2007

Need...Dinner...Quick

I am all about dishes that are fast, easy, and bursting with fresh flavors. When I'm tired (which seems to be all the time lately) I sometime cave in and have A pick up a pizza or just eat a bowl of tomato soup with a grilled cheese...both always comforting and satisfying. Yet, sometimes you just crave fresh, simple ingredients. This is exactly one of those dishes. I love insalata caprese- an Italian salad that consists of tomato, mozzarella, and fresh basil. I turned this love into a pasta dish for those days when a salad is just not enough!


Whole Wheat Linguine with Pan-Roasted Tomatoes and Basil Cream

1/2 box of whole wheat linguine
about 2 cups of cherry tomatoes
1 cup pesto
1/4 cup sour cream
1 tub bocconcini (small mozzarella balls)
olive oil
salt and pepper (to taste)

Pesto:
1-1 1/2 cups fresh basil
1-2 cloves of garlic (I like mine with a lot of garlic, so adjust to your palate)
1/4 cup toasted pine nuts
1/8 cup of Parmesan
juice of half a lemon
olive oil
salt and pepper to taste

In a blender or food processor, blend all ingredients together with about two tablespoons of olive oil to start. Once you begin blending, start slowly drizzling olive oil through the top until it gets to the consistency to like. I prefer my pesto on the thicker side, but some people like it thinner. If you are not in the mood to make your own pesto, store bought pesto works just as well!

To assemble the pasta:
Cook linguine using box directions (make sure to salt your water!). In a medium size pan, add olive oil and roast cherry tomatoes with salt and pepper just until they start to split. Take off heat and let them cool. In the meantime, mix pesto and sour cream together. Then, toss noodles, tomatoes, and mozzarella all together and top with a generous scoop of basil cream mixture. This dish is best eaten at room temperature.

Thursday, October 25, 2007

Mushy and Tasty Mess

I have no picture for this recipe because the pictures that I did take show that the meal had turned into a mushy mess. I decided that even though my experience with this recipe was not wonderful, someone else may have a better one. Unlike the other previous botched up cooking attempts (for example, Cooking Light Shrimp Curry mishap) I actually DID follow the recipe this time, measuring everything out as carefully as I could, and still I seemed to foul it up. The flavors in this recipe are good- I like the lemon, olives, and oregano. However, the proportion of orzo to chicken stock is in question (or it may be my fault too, which is very likely). Orzo tends to turn out somewhat creamy by itself, considering it is the rice for risotto. However, when I took the dish out of the oven, the orzo was not only creamy but almost melded together and stuck. It looked like golden oatmeal rather than rice. A loved it since he claims to like "mushy" things in general. I thought it tasted good although I did not enjoy the texture. However, I still brought it to work for lunch.

Chicken and Orzo with Lemon and Olives
*from Wednesday Chef

8 chicken drumsticks (I used six boneless, skinless chicken thighs)
Salt, pepper to taste
2 tablespoons olive oil
1 1/2 cups orzo
3 cups chicken broth
1 large clove garlic, minced
1 small lemon, cut into 8 wedges
1 teaspoon freshly squeezed lemon juice
3/4 cup pitted Kalamata olives (I used Spanish olives to cut cost)
1 large bay leaf
3 tablespoons chopped fresh oregano, divided (I used 1 tablespoon of dried oregano)

1. Heat the oven to 350 degrees. Season the chicken legs well on all sides with 1 1/2 teaspoons salt and 1 teaspoon pepper.

2. In a Dutch oven or large stockpot, heat the olive oil over medium-high heat. Working in batches, brown the legs well on all sides, about 5 minutes. Remove from the pan.

3. Add the orzo, chicken stock, garlic, lemon wedges and juice, olives, bay leaf and 1 tablespoon of the oregano. Stir to combine all the ingredients, then return the chicken to the pan. Cover and transfer to the oven. Bake for 25 to 30 minutes, until the chicken is done (the meat will be firm and its juices will run clear). Taste and adjust the seasoning if necessary, sprinkle with the remaining oregano and serve.

Tuesday, October 23, 2007

Looking for Inspiration

So, I've been a little MIA in the kitchen the past few days. Between work and rest (yes...or laziness may be a better way to put it) I just haven't had the time to cook. I do have several recipes in the works for this week, so those posts will come. However, I thought I'd start an "ideas" list on this blog. This list will be all the recipes I have on the back burner and will, hopefully, make their rotation into my kitchen. I admit, I am not a good cook in the sense of creativity. I rarely (there have been a few occasions) have been able to look at a set of ingredients and come up with some magical dish that is purely my own. My way of cooking? I take other recipes from cooks, websites, magazines, etc. and make a few of my own changes to them. If you notice, most of the recipes you find here are from other places. Maybe someday this will give me enough practice to be my own food artist and create a masterpiece. Until then, I'm happy to use the wisdom of others to please my stomach! Check out the list of recipes that I'll be trying soon, and maybe you can find one to try!

Thursday, October 18, 2007

Simple and Delicious- Dessert


I would say that I have a very slight sweet tooth. For instance, I love having something sweet usually after dinner or whenever I'm drinking my afternoon coffee. I only like a little of that something- just enough to cure the craving and not too much to make me sick. One evening while I was scouring my kitchen for some type of dessert makings I put this yummy dish together. Talk about simple and delicious! This is now one of my top ten favorite desserts and it only has two ingredients- vanilla bean ice cream and raspberries. The tartness of the raspberries balance perfectly with the creamy sweetness of the ice cream. It is just divine!


Vanilla Bean Ice Cream with Raspberry Sauce

1 small scoop of your favorite vanilla bean ice cream (I like Breyers- all natural!)
1/2 cup frozen unsweetened raspberries (Fresh raspberries could work too, but I always have frozen ones in my freezer. They work perfectly!)

Put frozen raspberries in the microwave and heat for about 1 1/2 minutes. It should be slightly warm (not hot!) and soft. Take a fork and smash the raspberries until they are a thick sauce. No need to add anything else- just pour over vanilla ice cream and eat. The warm raspberries should just melt the ice cream a little leaving swirls of pink and white. Optional: You can also top with roasted walnuts for a crunchy addition.

Tuesday, October 16, 2007

When Life Hands You Bland Curry...

Well, life really didn't hand me bland curry...Cooking Light did. And even so, I can't blame Cooking Light entirely for a not-so-tasty recipe since I didn't follow it. In my rush to make the curry, I had to use frozen shrimp. I was supposed to thaw it and then marinate the shrimp in the coconut curry sauce. After marinating it, the shrimp had to be steamed in a wok. Long story short, I didn't do any of this and ended up with what could only be called shrimp curry soup. I put too much coconut milk and added a touch of chicken broth. It was okay- not completely inedible. It just was boring.


Well, I didn't want to throw out a whole batch of curry "soup" and rice. What a waste that would be! With a little bit of creativity I actually came up with this recipe, which is much better.


Coconut Curry Shrimp Fried Rice
*adapted from Cooking Light

1/2 can light coconut milk
1/4 cup chicken broth
1 small red pepper, diced or sliced into thin strips
1 tbsp of fresh lemon juice
1 1/2 tbsp fish sauce (or pad thai sauce)
1 tsp honey or brown sugar
1 tsp curry powder
1 1/2 pounds shrimp, peeled and deveined
1/4 cup chopped salted and roasted cashew
3 tbs olive oil
a sprinkle of chopped green onion
1-2 cups of cooked basmati rice
Lime wedges

To make the curry sauce:

In a medium pot, saute red pepper with 1 tbsp of olive oil until softened. Pour in coconut milk and chicken broth and heat together until a light boil. Add lemon juice, fish sauce, honey, curry powder, and salt and pepper to taste. Let the whole sauce simmer for about 15 minutes on medium low until all the flavors have melded together. Add in shrimp and cook shrimp until pink.

To make the fried rice:

In a wok, heat up 2 tbsp of olive oil. Once the oil is hot, add in cooked rice. Stir fry rice for about 3-5 minutes. Add in curry sauce slowly, one ladle at a time, to make sure the rice is not soupy. You want the curry to just infuse flavor through the rice, having no extra liquid settling at the bottom. Stir fry all together, adding the cashews toward the end. Take off heat and garnish with green onion and lime wedge. Optional: Add in an egg at the very center of the wok half way through the process, scrambling it in the center as you cook the rice.

Monday, October 15, 2007

Simple and Delicious


I like dishes that are really simple to make but packed with layers of flavor. When Aaron and I went to visit our friend Shannon, she made us this wonderful sofrito dish. Her dish had the addition of pieces of fish and scallops, which I definitely recommend. However, since we had no seafood in the house (for the exception of some curried shrimp that turned out less than great-story and better recipe to come) I kept my dish vegetarian with just beans, rice, and sofrito. If you are not a seafood lover and need the addition of some meat, chicken would also work nicely. Thanks Shannon for a wonderful meal and a recipe to add to my collection!

Sofrito Dinner
*adapted from our friend Shannon's recipe

1 bag VIGA yellow Spanish rice (cooked according to directions on the back)
1 can black bean (heated) *I season mine with about a tsp of chili powder, 1 tsp cumin powder, and a splash of lime for added flavor

For the Sofrito:
1 28 oz can of crushed tomatoes
2 garlic cloves, minced
1 small onion, diced or cut long and thin
1 cubanelle pepper
1/2 a lime
*1 tsp of adobo chili (optional- I added this to give the sofrito a spicy and smokey undertone)
paprika (to taste)
olive oil

To make the sofrito, coat the bottom of a pan with a small amount of olive oil (about a 1-2 tbsp) and saute the onions on medium heat until they are slightly caramelized and translucent. Add the garlic and cubanelle pepper. Saute all together until ingredients are softened. Add crushed tomatoes and cook for about 10-15 minutes. Add in 1-2 tbsp paprika (to taste), adobo chili, lime juice, and salt and pepper (again, to taste). Let it simmer for another 10-15 minutes. Serve on top of black beans and rice.

If you are adding protein (seafood, chicken, pork), cook separately and season how you like. Add on top the above dish.

Friday, October 12, 2007

Apples...Good...Muffins...Good


I finally had a day off yesterday and I must say I really did need it. I feel I've been running on empty for a few day now, so having two days off from Sbux is giving me time to refuel for the weekend. Having said that, I now have time to post a few recipes and cook a bit more.

There is just a hint of Fall here in Orlando. When I walked outside this morning to my car, the air was little cooler than usual. I am so glad! It has been too hot here for too long! So, as promised the other day, here is my recipe for apple spice muffins. Since I used whole wheat flour and one cup of sugar less than most recipes, the muffins were not only healthy but substantial. It is great with a swipe of honey butter!


Apple Spice Muffins

3 cups whole wheat flour (or 1 cups unbleached flour and 2 cups whole wheat flour)
1 tsp baking soda
1 tsp salt
1/2 tsp baking powder
1 tsp cinnamon
1/2 tsp nutmeg
1/2 tsp ginger
1 cup brown sugar
1 cup vegetable oil
3 large eggs
1 tsp vanilla extract
2 apples (your favorite apples of the sweeter variety) chopped and diced
1 handful of chopped walnuts

Preheat oven to 325 degrees and line your muffin tin with liners

Whisk or sift together all the dry ingredients in a medium bowl. In a separate bowl, beat eggs, sugar, oil, and vanilla. Add in dry ingredients and mix well with a wood spoon or spatula. Stir in chopped apples and walnuts. Batter will be very thick and sticky!

Divide muffins in muffin tin. They will not rise very much, so you can fill them about 2/3-3/4 high. Bake for 25 minutes and test with a toothpick (or chopstick for me) to make sure centers come out clean .

Monday, October 8, 2007

Fall and Pumpkins

Fall is usually my favorite time of year- the air gets a little criper and the leaves start to change. I love that first evening when you have to grab your sweater and need to where shoes instead of summer sandals. In Orlando, sadly it has not felt like Fall. It is still too hot during the day, even though the evenings are a cooler 85 degrees. It really makes me miss days in Boston.


*photo from virginiaplaces.org

With my new schedule of working two jobs, I don't have as much time to cook as I used to. I'm lucky these days to get two days a week to make an actual dinner rather than eating a bowl of cereal when I get home at 11:30 at night. This weekend I did wake up early Sunday morning to make some apple spice muffins to welcome Fall and October (recipe to be posted hopefully tomorrow). So until I can post tomorrow, I leave you with one of my top five favorite things about fall: the pumpkin patch. I actually don't like pumpkin in dishes (yes, even pumpkin pie is not a pie I choose to eat) but I LOVE going to the pumpkin patch to get my Halloween pumpkin. I like to walk around and inspect them all before I choose one to take home. I like that each pumpkin is so different from one another in texture, markings and patterns. For me, it is truly an amazing sight to look out among all the pumpkins placed on tufts of hay. It just reminds me that there are things to be excited about still- even if they are small.

Friday, October 5, 2007

Classic Comfort Food (for me at least)


The weather has been dark and rainy lately. I wish I could say it was colder, but here in Orlando, Florida it is still a balmy 90 degrees. Even so, I still love gray days when you can hear the sound of the rain and thunder. It is almost relaxing and perfect for a bowl of veggie chili! This chili is based on my best friend Mel's dad's recipe. It was a favorite of mine and has become a "usual" in our house.


Veggie Chili
*adapted from Mel's dad's recipe

1 16 ounce can of kidney beans (drained and rinsed)
1 larger size can (I think it's a 20 ounce can) of chili beans in zesty sauce
2 16 ounce cans of diced tomatoes, with green chili and/ or in chili ready sauce
1 medium bell pepper, diced
1 small onion, diced
1 small garlic clove; minced or pressed
1/3 can or bottle of your favorite beer
1 small box of frozen corn
1 tbsp olive oil
1 tbsp unsweetened cocoa powder
1 tbsp chili powder
1 tsp cumin powder
1 tbsp brown sugar
1 tbsp worschestire sauce

In a large pot, saute onion, garlic, and diced bell pepper in olive oil until tender and slightly brown (not burned!). Add in beans, can tomatoes, and beer. Let it simmer for about 10 minutes. Then add cocoa powder, chili powder, cumin powder, brown sugar, and worschestire sauce. Let it all simmer together for another 30-40 minutes. Five minutes before serving, add in the frozen corn. Once all the flavors have infused in each other and the corn is heated, serve with shredded cheese and a dollop of sour cream. Also works great with cheese quesadillas on the side!


Wednesday, October 3, 2007

Mmmm...Strata

So, my first no-pasta meal was a very delicious concoction. I know, I basically replaced bread for pasta. Since A and I don't eat much meat, it is so much easier to use starch to bulk up a meal. Either way, this was a fabulous dinner and I am definitely adding this to my list of nightly meals. It was easy to put together and you can experiment by adding different ingredients (such as leftover veggies) to make it a whole new creation. I love versatile dishes!


Tomato, Goat Cheese and Feta Strata
*Adapted from Food and Wine

4 large eggs
1/2 cup low fat or nonfat plain yogurt
3 tbsp chopped fresh parsley (basil would also work nicely)
1 tbsp extra virgin olive oil
1 medium thinly onion, thinly sliced
1 large garlic clove, finely chopped
1 tbsp dried sage
1/2 tsp crushed red pepper
1 14.5 oz can of diced tomatoes, Italian style (with garlic, basil, and oregano)
5 oz. of whole wheat artisan peasant bread, cut into 1 in. cubes
1/4 cup feta
1/4 cup crumbled goat cheese

Preheat oven to 450 degrees. In a medium bowl, whisk eggs, then whisk in yogurt and parsley. Add salt and pepper (a few pinches of each). In a pan cook onion in olive oil until slightly caramelized, then add in garlic, sage, crushed red pepper, and salt and pepper to taste. When garlic is slightly browned (not burned) add whole can of diced tomatoes with juice and stir together. Take pan off of heat and add in the bread cubes. Mix all together so that each piece of bread is coated in the tomato mixture.

Spray a medium size baking dish (close to 10x10) with non stick spray and add bread mixture. Pour over the egg mixture and goat cheese and mix lightly to be sure the egg and cheese seeps through all the cracks. Top with feta and bake for 20 min until golden brown. Let it cool slightly and serve.

Tuesday, October 2, 2007

A Tribute with Pears


This recipe is a twist on one I took from A's Great Aunt B. Great Aunt B was an amazing woman and one of my absolute favorite people who I feel very privileged to have met. Sadly, she passed away this year, making the world a little less nicer to live in. Before we officially moved to Orlando, I was lucky enough to live with Great Aunt B for a few months while A was finishing up things in South Florida. During that time, she showed me a recipe for curried fruit that was absolutely delicious. It was warm, sweet, spicy and drizzled all over vanilla ice cream. I never thought of making a dessert with curry and fruit together, but as I was researching it on the internet I discovered this dish is actually very southern. Who knew? (I honestly would never have guessed since curry seems so exotic for the South). It did sound a bit strange to me at first, but it really is one of the best desserts I've had. So, here's to Great Aunt B! This recipe is typically made with a can of fruit cocktail (which is equally delicious), but I decided to use fresh pears and a little less sugar to make a guilt-free version.


Curry Poached Pears

2 firm pears, peeled, halved and cored
2 cups water (OR 1 cup water and 1 cup of good white wine)
1/2-1 cup brown sugar (I don't like it as sweet, but some may)
1/2 tsp cinnamon
1/2 tsp ginger powder
1 tsp curry powder

To prepare the poaching liquid, bring the water (or water/wine mixture) and brown sugar to a boil then lower heat to about medium. Add cinnamon, ginger powder and curry powder. Keep it on a low rolling boil for about 5-7 minutes until everything is dissolved and mixed together. The liquid should be a little thicker, but not syrupy. Next place pears with flat halved side down. Poach pears for about 30-40 minutes (depending on how firm your pears are), flipping them half way through so the whole pear gets poached evenly. The pears should be fork tender. Once they are done, let them cool for several minutes. Then serve with vanilla ice cream and toasted walnuts.

Monday, October 1, 2007

No-Pasta Week Begins

So, this week as a challenge I will make no pasta dishes. This is going to be very hard! I'm headed to the grocery store tonight with no idea of what to make....I need to start thinking now! Since I'm starting my second job this week, there will only be a few nights I'll be able to actually cook a meal. That makes it a bit easier...

Friday, September 28, 2007

When You Don't Feel Like REALLY Cooking


Picture from Food Network

You take recipes from Giada De Laurentis! She is one of my absolute favorite Food Network chefs. Everything she makes (that I've at least made at home) tastes amazing and is never too hard to figure out. Since I didn't cook last night (at all) and just ate leftovers, I thought I'd post one of my favorite Giada quick-fix dinner meals. We actually have made this quite a few times. I know, I've been told we make WAY too much pasta...but we love pasta! Maybe next week, it'll be no-pasta-eating week as a challenge. Happy Friday!

Rigatoni with Red Pepper, Almonds, and Bread Crumbs
from Giada de Laurentis, Everyday Italian

1 pound rigatoni pasta
3 cups purchased garlic-flavored croutons, (about 5 ounces)
1/4 cup slivered almonds (about 1 ounce), toasted (*Pine nuts work really well too!)
1 cup julienned roasted red bell peppers
3/4 cup extra-virgin olive oil

Bring a large pot of salted water to a boil over high heat. Add the pasta and cook until tender but still firm to the bite, stirring occasionally, about 8 to 10 minutes. Drain pasta into a large bowl.
Place the croutons and the almonds in a food processor. Pulse until it becomes the texture of bread crumbs. Add the crouton and almond mixture to the hot pasta. Add the peppers and the olive oil. Toss to combine and serve.

Wednesday, September 26, 2007

A Pasta Built for the Boys


I say this because if there is any pasta that describes my husband perfectly, it is definitely this dish. It has all his favorite ingredients melded together in one "manly" dish that is both delectable and filling. I am very fortunate because A is not a picky eater- he is willing to try all my creations with a fork and a smile. As he says there are things he wouldn't "prefer" but "I just eat to eat." HA! Spoken like a true man...


Pasta with Sausage, Basil, and Mustard
from Food and Wine


1 pound penne or medium shells (whole wheat pasta works great!)
1 tablespoon extra-virgin olive oil
8 hot Italian sausages, meat removed from casings and crumbled (about 1 1/2 pounds)
3/4 cup dry white wine
3/4 cup heavy cream
3 tablespoons grainy mustard
Pinch of crushed red pepper
1 cup thinly sliced basil


**I added a tbsp of honey into the sauce to cut some of the bite of the mustard. Also I put slivers of eggplant which ended up being my favorite part of the dish. So, for all you veg heads, just substitute eggplant or mushrooms for sausage.


Cook the pasta in a large pot of boiling salted water until al dente; drain. Meanwhile, heat the olive oil in a large, deep skillet. Add the sausage meat and brown over moderately high heat, about 5 minutes. Add the wine and simmer, scraping up the browned bits from the bottom, until reduced by half, about 5 minutes. Add the cream, mustard and crushed red pepper and simmer for 2 minutes. Remove the skillet from the heat, add the pasta and basil and toss to coat. Serve at once.

Tuesday, September 25, 2007

A Snack Break

I always crave a slightly sweet snack in the early afternoon. These almond scones are perfect with peach preserves and a hot cup of tea.

Almond Scones
adapted from Tyler Florence's blueberry scone recipe on Food Network

2 cups all-purpose flour
1 tbsp baking powder
1/2 tsp salt
2 tbsp brown sugar
5 tbsp unsalted butter, cold, cut in chunks
1/2 cup heavy cream, plus more for brushing the scones
1/2 cup non-fat milk
1 tbsp vanilla extract
1 tbsp almond extract
handful of almonds for topping

Preheat oven to 400 degrees F.
Sift all dry ingredients together- the flour, baking powder, salt, and sugar. Using a fork cut in the butter to coat the pieces with the flour. The mixture should look crumbly. In a separate bowl mix all liquid ingredients together- heavy cream, milk, both extracts. Make a well in the center of the dry ingredients and pour in the liquid ingredients. Fold everything together just to incorporate; do not overwork the dough.

Press the dough out on a lightly floured surface into a rectangle about 12 by 3 by 1 1/4 inches. Cut the rectangle in 1/2 then cut the pieces in 1/2 again, giving you 4 (3-inch) squares. Cut the squares in 1/2 on a diagonal to give you the classic triangle shape. Place the scones on an non-greased cookie sheet and brush the tops with a little heavy cream. Then press in almond pieces to top. Bake for 15 to 20 minutes until beautiful and brown. Let the scones cool a bit then enjoy with some butter or preserves.

Saturday, September 22, 2007

Fig-alicious


Figs...I'm starting to create a new relationship with figs. I love dried figs topped on pizza, fig jam on toast, even the fig newton. I've used dried figs when cooking, but I've never even tasted a fresh fig. I recently bought some fresh figs to challenge myself to actually do something with them. I did my research and learned that figs are a touchy fruit. They ripen quickly and if you don't use it at the exact moment they spoil. Also, I noticed compared to the wonderful fresh figs I saw online, my figs were not nearly as pink or juicy looking. They didn't taste the way they were described either. Mine were a bit too dry and bland. Oh well! I just think I got a not-so-good batch. However, I wasn't about to let that defeat me, and in the end decided to do a wonderful version of a fig tart. I knew roasting it would bring out more syrupy sweetness, and the honey, fig jam, and goat cheese would help to enhance its flavor. I guess mine isn't really a "tart," but since I'm not sure what to really call it "tart" will have to do.


Fig "Tarts" with Goat Cheese

6 ripened fresh figs (you can use dried ones too)- sliced thinly
goat cheese
honey
fig jam
ready-made pie crust (if your a good baker, you can make your own!)

Unroll the ready-made pie crust. Using a knife or cookie cutter, cut out little tart bases (about 3x3 in. squares). Swipe a layer of fig jam on the bottom then layer on the figs in a circular formation. Drizzle honey on the figs and top with goat cheese. Place in a 375 degree oven for about 20 min (the pie crust and goat cheese will be slightly browned). Let it cool and then enjoy!

*You can also substitute fresh pears for the figs and use a ginger spread with the pears instead of fig jam.

Monday, September 17, 2007

Eggplant Meets Lasagna

I love eggplants-from their wonderfully dark purple skins to their cream colored flesh. They are just beautiful vegetables that happen to taste as good as they look and are extremely versatile. On my last trip to the local farmers market, I happen to stumble on a rather large and perfect looking eggplant for only $1.50. This was definitely the bargain of the week. With a rather picky family, several who claim to NOT like eggplant, I needed to try to disguise and highlight this vegetable in dinner.


Veggie Lasagna with Eggplant

Filling:
1 15oz tub part skim ricotta cheese
1 small box of frozen chopped spinach
1/2 cup crumbled feta cheese
salt, pepper, dried or fresh basil to taste

Completely thaw the box of frozen chopped spinach. Place in small towel and squeeze spinach to get all the water out. You want to get it as dry as possible. Mix ricotta cheese, spinach, crumbled feta. Add salt (a generous pinch since ricotta can be rather bland), pepper, and dried or fresh basil to taste. OPTIONAL: You can beat one egg and add it to the mix, although I learned it is not necessary. Place in fridge until ready to use.

The rest of the lasagna:
1 jar of your favorite marinara sauce (I used Newman's Cabernet Marinara)
1 box no-boil lasagna noodles (Barilla works nicely- you can boil your noodles if you prefer, but I found the no-boil noodles prevent overcooked noodles)
1 large eggplant
8 oz of shredded mozzarella cheese
a few handfuls of freshly grated Parmesan cheese
*OPTIONAL: 2 medium sweet potatoes (boiled then mashed with a touch of butter, salt, cinnamon, and nutmeg)

Cut your eggplant into 1/2in thick slices. You want them thick enough so they don't fall apart in the whole cooking process. Place your eggplant slices on a well-sprayed (with canola oil) cookie sheet. Make sure each slice has its own place on the sheet and don't pile them on each other. This will cause the eggplant to steam instead of roast. Sprinkle salt on eggplant slices. Roast eggplant for about 20-25 min on 375 degrees, flipping them about 2/3 of the way through. The eggplant slices should be slightly browned and soft and creamy in the middle.

To assemble, spray your pan (I used 8inx8in) with non-stick canola oil. Add a light layer of sauce to the bottom of the pan. Place noodles, a layer of your prepared filling above, then a layer of your roasted eggplant, a light layer of shredded moz and then another layer of sauce. The second layer, continue the same process but add a layer of your mashed sweet potatoes right before you add the prepared filling.

Continue the same layers on up through the pan, layering the mashed sweet potatoes in every other layer if you so choose. At the top, the very last layer should be topped with a generous topping of freshly grated Parmesan cheese.

Preheat oven to 375 degrees. Cover lasagna with foil and cook for about 50 minutes. Then uncover and cook lasagna for another 10-15 minutes or until cheese is slightly browned and bubbly.