I'm trying to get life a bit more organized. I'll be back in January 2009!
Happy Holidays and cheers to a bright and exciting new year!
Sunday, December 14, 2008
Sunday, November 9, 2008
Hello November
It's November! Turkey month!

I'm slowly starting to plan our Thanksgiving meal. It's my favorite meal to plan since I am proud to say that A and I do one of the best turkeys around. The past two years we've done a turkey with citrus and herbes de provence. This year I want to do something different, but I haven't found the perfect recipe yet.
It's also pumpkin time! I'm learning to really like pumpkin. For awhile, it was not high on my list nor would I go out of my way to make anything with pumpkin. However, lately I've actually craved those pumpkin pie flavors of cinnamon, clove, nutmeg. I found this recipe in my October edition of Gourmet magazine. It was a good bread...quite tasty and crumbly. It was excellent for a snack with a swipe of real butter and a drizzle of honey. I kept to the recipe for the most part, except I added a lot less sugar. I didn't want a really sweet bread, but I'm sure it would be just as delicious with all the sugar. Also, I know the recipe said PUMPKIN bread, but there wasn't pumpkin puree at Whole Foods. So, instead I used sweet potato puree, which was very yummy. It wasn't a loaf cake and really was more like a bread, so don't expect a moist Starbucks-like pumpkin pound cake. However, that sounds good too and I may look for that recipe next!
Pumpkin Walnut Bread (or Sweet Potato Walnut Bread for me)
From Gourmet Magazine, taken from The Art and Soul of Baking by Cindy Mushet
2 cups unbleached all-purpose flour
3/4 tsp baking soda
1/2 tsp ground cinnamon
1/4 tsp allspice
1/4 tsp ground cloves
1/4 tsp ground ginger
1/4 tsp salt
2 large eggs, at room temperature
1/3 cup water
1 1/2 cups sugar (I used only 1/2 cup)
1 cup canned pumpkin puree (I substituted sweet potato puree since there was not pumpkin at my store)
1/2 cup vegetable oil
1 tsp vanilla extract
1 cup chopped and toasted walnuts
1. Preheat oven to 350 degrees and position oven rack in the center. Lightly coat a 9 by 5 inch loaf pan with melted butter and line the bottom with parchment paper.
2. In a large bowl, whisk together flour, baking soda, cinnamon, allspice, cloves, ginger, and salt until blended. In a separate medium bowl, whisk together eggs and water. Add sugar and blend well. Add pumpkin puree, vegetable oil, and vanilla extract. Blend well.
3. Add pumpkin mixture to dry mixture and whisk until blended smooth. Add the walnuts and stir until they are evenly distributed. Use a spatula to scrape the batter into the prepared loaf pan and level the top.
4. Bake for 55 to 65 minutes, until bread is firm to the touch and the toothpick inserted comes out clean. Transfer to a rack and cool completely.
Can be stored up to 2 days at room temp or up to 4 days in the refrigerator.
Sunday, October 19, 2008
An Old Favorite- Reinvented
To keep food life interesting (and easy), I take dishes I usually make and see how I can throw in new ingredients to change them up a bit. I think everyone who likes to cook does this, especially when trying to clean out the pantry or refrigerator. It's also great when you are in a cooking rut, which I've been in for a few months.
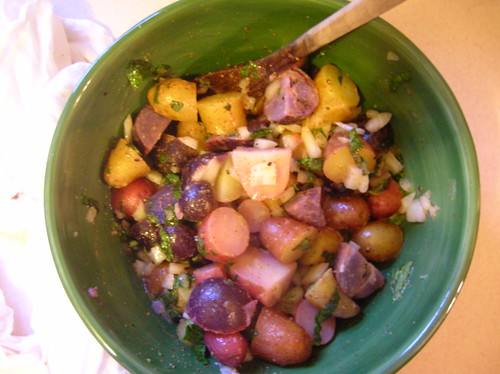
We love turkey burgers! Our usual accompaniment to burgers are baked sweet potato fries. This time, I decided to change it up and make a potato salad. I've made a creamy potato salad before, but the past few times I've actually made one with a mustard vinaigrette. It's not only lighter, but more flavorful as well. It's good cold, but I think it's better slightly warm.
Tri-colored Mustard Potato Salad
1 small bag of tri-colored baby potatoes (I didn't get the weight off the bag, unfortunately, but it's a small bag that looks like it serves 4)
1 small onion, diced
2 tbsp stone ground Dijon mustard
4 tbsp of extra virgin olive oil (more if you need)
1 tsp honey
juice from half a lemon (more if you like it lemony)
couple pinches of salt and pepper
small handful of basil, chopped.
Cut potatoes in half and boil (starting them in cold water) until fork tender. Drain and set aside. For the vinaigrette, whisk together mustard, olive oil, lemon juice, honey, salt, and pepper until blended. Mix potatoes (while still slightly warm), onion, vinaigrette, and basil together and serve.
Tuesday, October 7, 2008
Bringing Fall to Florida
It's officially October and the start of fall. Since we live in Florida, you would never know since the weather is still warm...maybe a touch cooler in the evening. I long for an actual fall where the leaves change and the weather starts to turn into sweater weather. Its one of my favorite times of year!
Another great thing about fall is the fall food...like Thanksgiving. Yum! But, I also like big and hearty bowls of comfort food in the form of soups and chili. Lately, the hubby and I have such busy schedules that these dishes are great time savers! I can make a big batch that will last us for days!
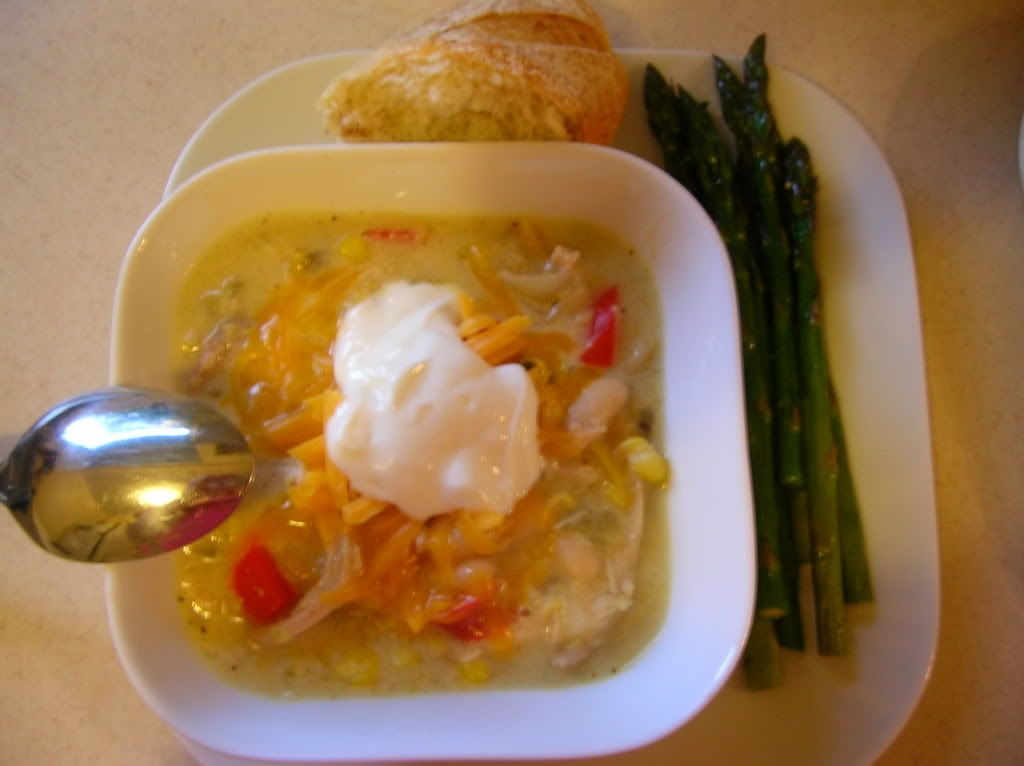
I found this chili recipe on an ad for Kerrygold cheddar (a really tasty Irish cheddar). I made a few additions to it, but as a whole it was a great recipe! I loved the diced green chiles in it, which made it just spicy enough.
I found this chili recipe on an ad for Kerrygold cheddar (a really tasty Irish cheddar). I made a few additions to it, but as a whole it was a great recipe! I loved the diced green chiles in it, which made it just spicy enough.
White Chicken Chili
from Kerrygold Cheddar advertisement, with minor additions from me
1 tsp olive oil
1 medium onion, chopped
1 medium yellow or red bell pepper, chopped
1 small jalapeno, minced
1 1/2 tsp cumin
1 tsp chili powder
1 pinch poultry seasoning
1 (15 oz) can cream-style corn
1 (7 oz) can mild green chiles, diced and not drained
2 cups whole milk
1 (15 oz) can white beans (navy or cannellini), drained
2 cups shredded chicken
salt and pepper to taste
shredded cheddar and sour cream to top
shredded cheddar and sour cream to top
In a large skillet or pot over high heat, add olive oil, onion, pepper, and jalapeno. Cook until softened. Add cumin, chili powder, poultry seasoning, corn, green chiles, milk, and beans. Bring to a boil then reduce heat, cover, and simmer for about 10-15 minutes. Add chicken, salt and pepper to taste. Serve with shredded cheddar and sour cream.
Monday, September 8, 2008
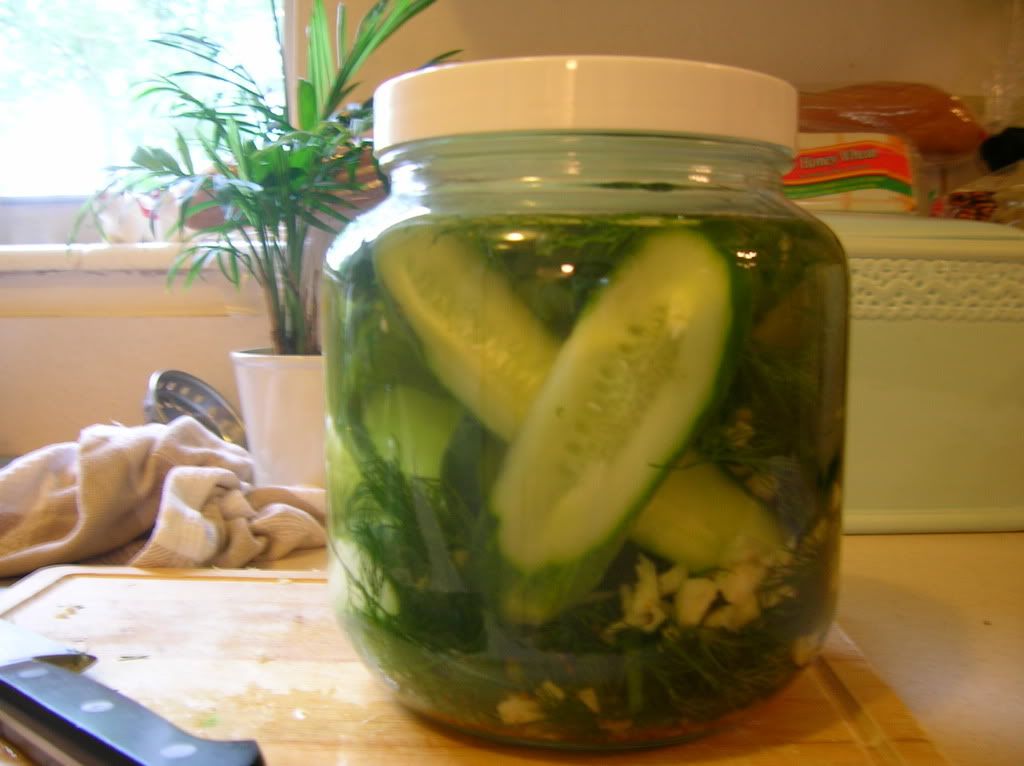
First Homemade Pickles
My first attempt at homemade refrigerator dill pickles was fantastic. They were INCREDIBLY easy! They even tasted better than the ones I buy at the store. I love pickles on burgers, on sandwiches, or just for snacking. That vinegar and salty bite is just perfect for any meal. I used the recipe below. However, I added some sugar just to balance out the vinegar. Next time, I think I will actually use less vinegar, add a little more spice (peppercorns), and a tad bit more sugar.
I can't remember where I got the recipe...but it's not mine and, if I find it again, I'll definitely post the source.
Refrigerator Dill Pickles
1 1/2 lb pickling cucumbers
3 tbsp coarse salt, divided
3 tbsp coarse salt, divided
1 1/4 cups white vinegar
3/4 cup water
1 package fresh baby dill (2/3 ounce or so)
6 cloves garlic, minced
1. Wash cucumbers and cut off ends. Cut lengthwise or into halves. Put cucumbers in a colander and sprinkle them with 1 1/2 tbsp of salt. Toss well Let it in sink or bowl for about 2 hours. Rinse cucumbers well and set aside.
2. In a small pot, combine water and vinegar. Bring to a boil over medium heat. Stir in remaining salt (and sugar). Remove from heat and let it cool about five minutes.
3. In a 1-qt jar with a tight fitting lid, put dill and garlic. Add cucumbers. Pour vinegar mixture over top. Add more water, if necessary to fill jar. Cover with lid. Allow to pickle in refrigerator for at least 3 days before eating. Pickles will keep for about 3 weeks.
Tuesday, September 2, 2008
And It Continues...
The lack of creativity and motivation is still hovering over my kitchen, drinking tea and eating biscuits. This weekend- a long three-day weekend, in fact- I did find a wee bit of energy to look through some cookbooks and old recipes hoping that I could find something tasty to make. After searching through magazines, books, papers, I decided that I can't force myself to find something motivating. It really has to find me. I feel like I'm getting there. I did pull myself off the couch to make some homemade refrigerator dill pickles, which were very delicious. That post will come in the next few days.
For now, I give you another household favorite since it's quick and flavorful.
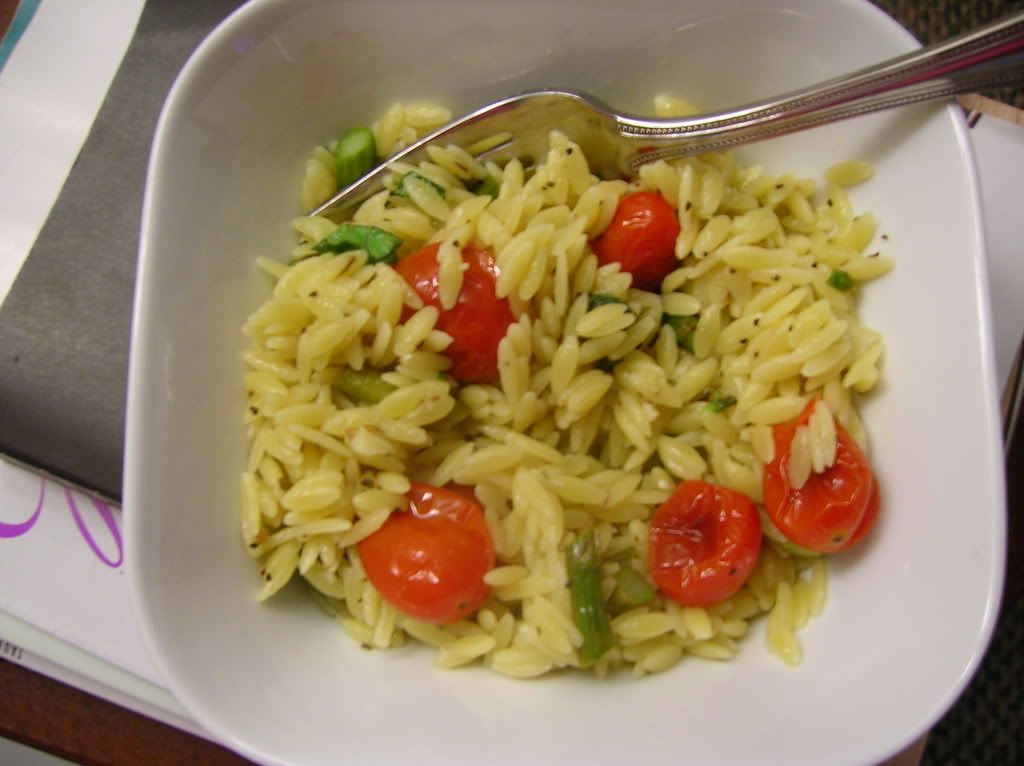
Orzo with Roasted Asparagus and Tomatoes
1 small box of orzo
1 bunch of asparagus
2 cups grape tomatoes
1 lemon
olive oil
handful of chopped basil and Italian parsley
salt and pepper
Place asparagus and tomatoes on a roasting pan. Drizzle them with a good amount of olive oil and some hearty pinches of salt and cracked pepper. Roast in a 400 degree oven for about 15-20 minutes (until the asparagus are soft and the tomatoes are blistered). While the asparagus and tomatoes are roasting, cook orzo according to package directions. Once the asparagus are done, let them cool for about 5 minutes and then cut into bite size pieces. Toss orzo, asparagus bits, tomatoes, and leftover olive oil from the pan with the juice and zest of one lemon, chopped basil and parsley. Add another drizzle of olive oil if it's too dry. Season with salt and pepper to taste, as well as some Parmesan cheese. This works great the next day for a pasta salad!
Thursday, August 28, 2008
Snack of Choice...for the Semi-Lazy
Lazy, lazy, lazy days for me. I've been going through a cycle of kitchen burn-out...or stressed-out. Not really sure which one at the moment. I have not cooked anything decent in awhile. Lately, when I get home, my first thought is "what do we have in the house that I can just heat up in five minutes." So, my kitchen has seen it's share of frozen pizzas, canned soup, and black beans and rice. Really...nothing interesting at all.
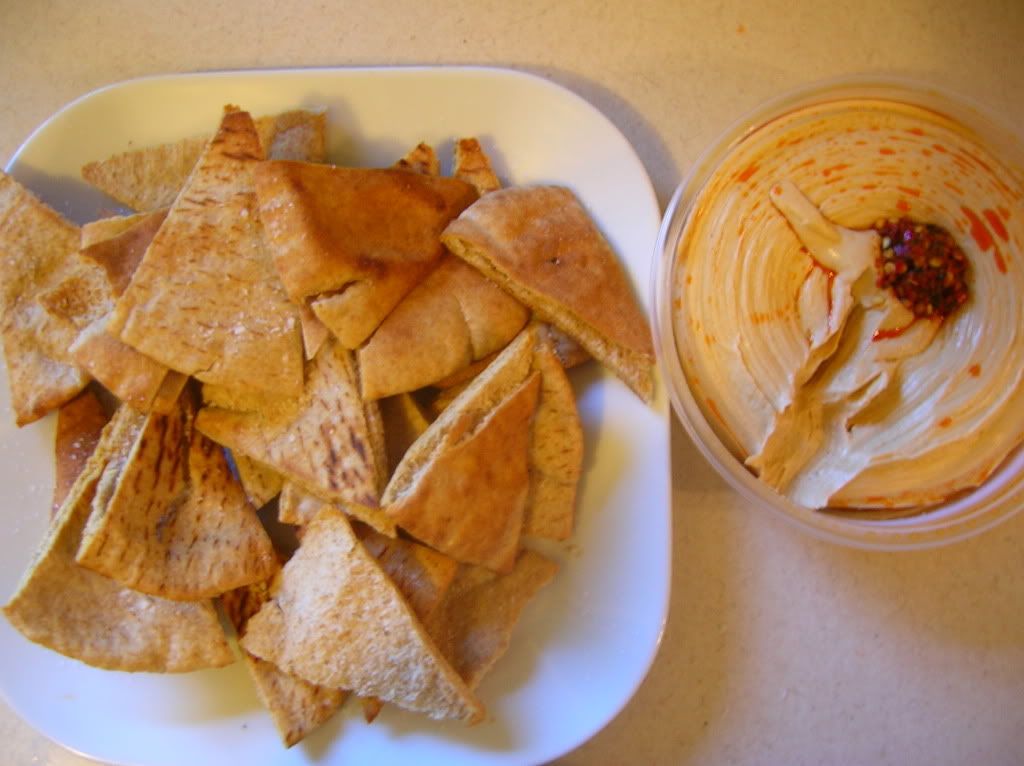
In the spirit of all that is lazy in the kitchen, I give you a recipe (as if it was really needed) for quick pita chips to dip into your store bought hummus. LOL!
Pita Chips (semi-homemade)
Leftover pita bread, cut into triangles
sea salt and pepper
olive oil
Pre-heat your oven to 400 degrees. Place the pita triangles on a cookie sheet. Spray or drizzle on olive oil to both sides. Sprinkle with sea salt and pepper (or any other seasoning you'd like to add...paprika, cumin, adobo). Place in the oven for about 10-15 minutes so it gets toasty (but not burned!). Eat after it's cooled a bit with your favorite dip. Easy!
Wednesday, August 20, 2008
Hurricane Day Cupcakes
I did get my half of a hurricane day, so that means I did get to make cupcakes. Hooray for hurricane day cupcakes! Fortunately, good old tropical storm Fay barely made an entrance for us. We just had some wind and rain. Our trees are still intact and we did not have to camp out with candles or a boy scout camping stove.

I saw this recipe for cupcakes on Nigella's show this weekend. I have failed several times at making cupcakes from scratch. They always came out too dry and hard. This, on the other hand, is one of the best cake recipes I've used! The cupcakes were AMAZING! They were moist and slightly fluffy, but still dense enough that you could tell they weren't from a box. It yielded exactly twelve cupcakes, which is perfect because I didn't want to be eating cupcakes all week. It is just such a great and easy recipe to have.
For the frosting, I didn't make her royal icing since I still get a little weird about using raw eggs. I'm sure eventually I'll get over it. Instead, I made a lemon white chocolate ganache frosting. It was such a good match for the cupcakes!
Nigella Lawson's Cupcakes
from foodnetwork.com
You can find the recipe here.
A few changes I made: I added one tbsp of almond extract instead of one of the tbsp of vanilla. I also added another tbsp (or two) of milk to thin the batter out a bit more.
Lemon White Chocolate Ganache Frosting
1 1/2 cup good quality white-chocolate chips or shavings
zest from one medium lemon
juice from 1/2 the lemon
2-3 tbsp milk
Melt the chocolate chips using a double broiler (or a double broiler method). Once melted, whisk in the rest of the ingredients until smooth. You can add more or less milk depending on the consistency you want. Let it stand for about 10-15 minutes to thicken and cool before frosting cupcakes.
I've done this method with dark chocolate chips and oranges too, and I've added lime instead of lemon to the above recipe. Both are great versions of the above frosting!
Monday, August 18, 2008
Back for Now
I actually did a bit of cooking this weekend...just a bit. My motivation is starting to come back and my mind is beginning to think about what new recipe I can try next. I have a Nigella cupcake recipe sitting on my kitchen counter hoping for a hurricane day. We are possibly getting one tomorrow- an itty, bitty one that is small enough to be of no concern but big enough to hopefully close work. A and I have survived several larger category three storms since we've been here and lucked out. So, a category one hurricane is really just a holiday for us. Hey, we tend to be optimistic.
On Friday, I finally had the urge to get myself into the kitchen. I decided to do something similar to this pasta recipe. I changed it up a bit, but it's still similar. It was very, very good. I wasn't sure how the canned clams would turn out, but it was really a great buy. If you don't like clams, this recipe would be tasty with shrimp too, or skip the seafood and just use an additional sausage.
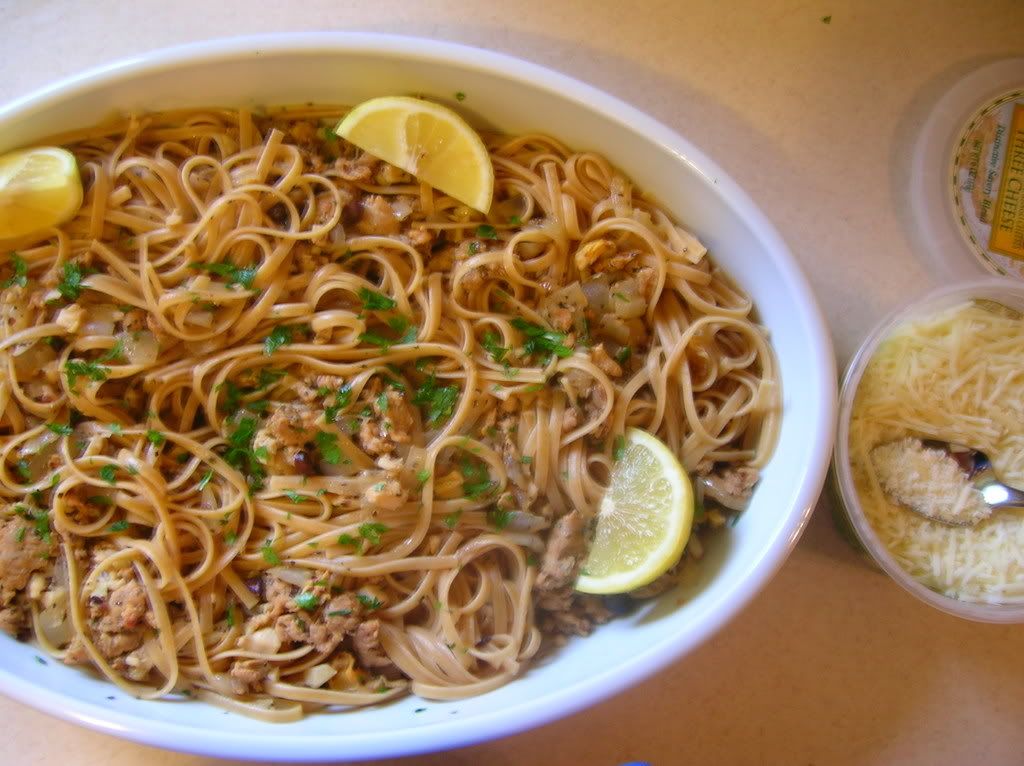
Sausage and Clam Linguine
adapted from Foodandwine.com
1 package linguine
1 small can of clams (in salt and water only, no preservatives or additives), drained but saving 2 tbsp
2 tbsp of the clam water from can
2 small spicy turkey sausages (spicy Italian, chorizo, or similar), uncased
1 small onion, diced
3-4 cloves of garlic, minced
1-1 1/2 cup good white wine
2 tbsp butter
1/2- 1 cup reserved cooked pasta water
juice from half a lemon
olive oil
dried basil
fresh parsley
salt and pepper
lemon wedges for serving
Cook pasta according to package directions.
In a large pan or skillet, uncase the turkey sausage and brown until cooked thoroughly. You may need to had a drizzle of olive oil since turkey sausage tends to be very lean. Once cooked, remove the sausage from the pan. Add another drizzle of olive oil to brown onion and garlic (add the garlic once the onion is partly cooked to avoid burning). After onion and garlic are browned and soft, add in the white wine, reserved clam water, some salt and pepper, and dried basil. Make sure you pick up the bits from the bottom of the pan. After cooking down the liquid for about 5-1o minutes , add in clams and butter. Simmer on low for another 5 minutes. Slowly add in reserved pasta water until you have a sauce-like consistency.Toss cooked pasta together with sauce, fresh lemon juice, and parsley. Drizzle a bit more olive oil if needed. Serve with a generous sprinkling of shredded Parmesan or Romano and a lemon wedge.
On Friday, I finally had the urge to get myself into the kitchen. I decided to do something similar to this pasta recipe. I changed it up a bit, but it's still similar. It was very, very good. I wasn't sure how the canned clams would turn out, but it was really a great buy. If you don't like clams, this recipe would be tasty with shrimp too, or skip the seafood and just use an additional sausage.
Sausage and Clam Linguine
adapted from Foodandwine.com
1 package linguine
1 small can of clams (in salt and water only, no preservatives or additives), drained but saving 2 tbsp
2 tbsp of the clam water from can
2 small spicy turkey sausages (spicy Italian, chorizo, or similar), uncased
1 small onion, diced
3-4 cloves of garlic, minced
1-1 1/2 cup good white wine
2 tbsp butter
1/2- 1 cup reserved cooked pasta water
juice from half a lemon
olive oil
dried basil
fresh parsley
salt and pepper
lemon wedges for serving
Cook pasta according to package directions.
In a large pan or skillet, uncase the turkey sausage and brown until cooked thoroughly. You may need to had a drizzle of olive oil since turkey sausage tends to be very lean. Once cooked, remove the sausage from the pan. Add another drizzle of olive oil to brown onion and garlic (add the garlic once the onion is partly cooked to avoid burning). After onion and garlic are browned and soft, add in the white wine, reserved clam water, some salt and pepper, and dried basil. Make sure you pick up the bits from the bottom of the pan. After cooking down the liquid for about 5-1o minutes , add in clams and butter. Simmer on low for another 5 minutes. Slowly add in reserved pasta water until you have a sauce-like consistency.Toss cooked pasta together with sauce, fresh lemon juice, and parsley. Drizzle a bit more olive oil if needed. Serve with a generous sprinkling of shredded Parmesan or Romano and a lemon wedge.
Tuesday, August 12, 2008
Busy as a Bee
I've been so busy lately. Busy with what? I'm not exactly sure but I know there has been a lot of "stuff" going on, which means hardly any cooking to document. I did make some disastrous ice cream cookie sandwiches that melted all over my freezer, along with a spicy eggplant stew that didn't have any flavor. I haven't quite figured out went wrong, but I have a list of suspects.
Hopefully this week I'll get to cooking SOMETHING good!
Hopefully this week I'll get to cooking SOMETHING good!
Friday, August 1, 2008
Garbanzo Love
I have fallen hard in love...with the wonderful and glorious chickpea! Beyond the relationship I have with hummus, I have now introduced the garbanzo to all sorts of new dishes. It's been great in salads, pastas, couscous- the possibilities are endless. I am a casual vegetarian (meaning I do eat white meat and seafood on occasion, when the mood strikes), so garbanzo beans are a nice addition to "beef" up a dish.
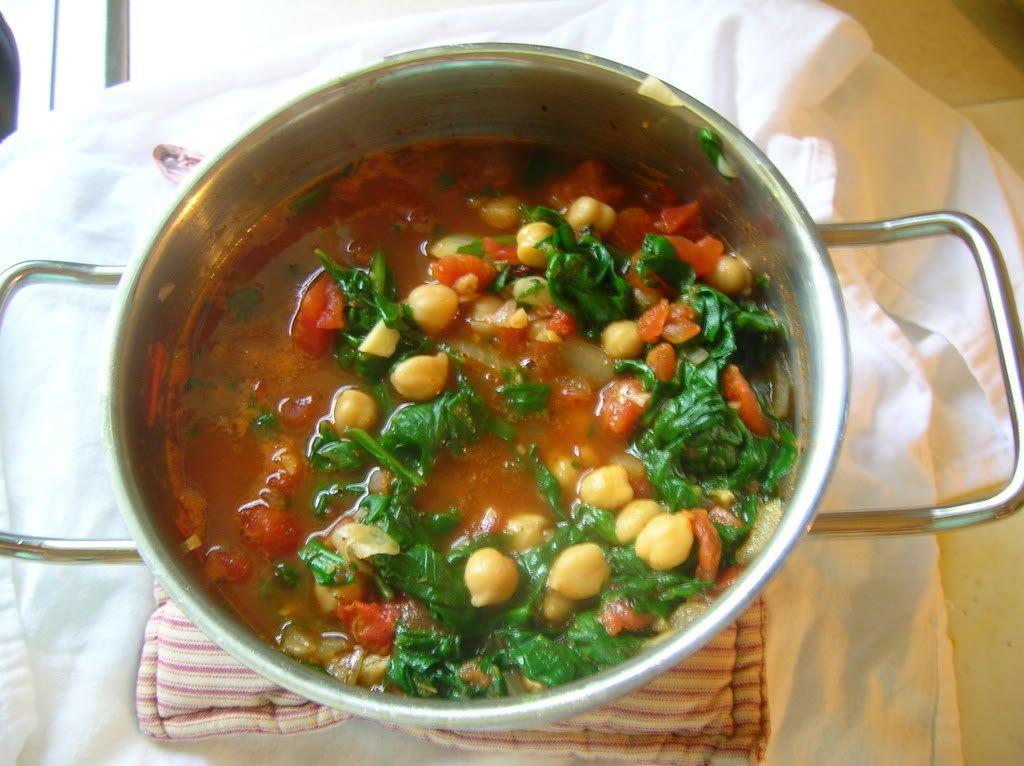
This recipe is absolutely a keeper! I love tapas and I have seen this stew on a few Spanish menus. It is easy to make and really could be eaten as a side dish, or as a main course with some crusty bread and cheese.
Chickpea and Spinach Stew
from Foodandwine.com
You can find the recipe here.
Wednesday, July 23, 2008
Lazy with Asian Flair
A and I have been more busy than lazy, really. I think we have had one weekend at home together in a few months. Between small trips and A's grad school, it's been non-stop moving around! I can't complain too much since I like having somewhere to go. However, it has made me that much more tired during the week, which means less cooking. I have been making a lot of quick and simple dinners that are also light for the summer heat. Since I don't indulge my Asian side too much, I try to experiment with the most basic of Asian ingredients. The recipe calls for toasted sesame seed oil and kimchi- both staples in the Korean household. Kimchi can be an acquired taste if you're not used to it, but I've been eating it since I was a child. I love it! The tangy and spicy cabbage just adds a nice kick to an Asian dish, especially this very simple one.
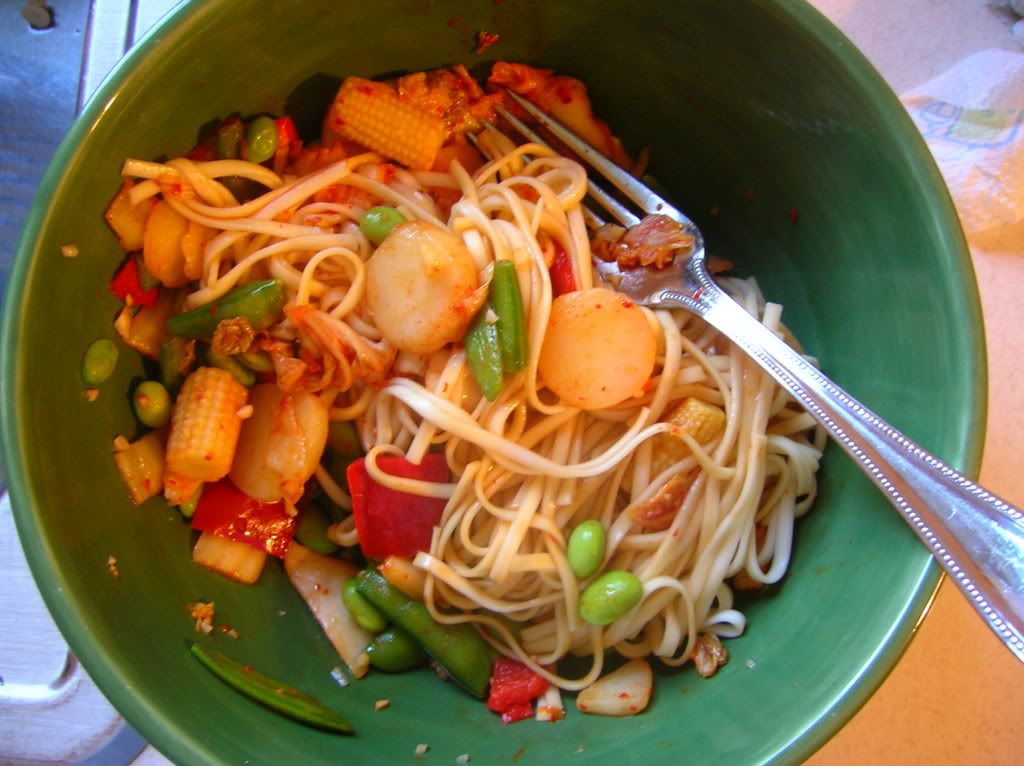
This one has been a recent favorite go-to of mine since it takes no more than a handful of ingredients and ten minutes to prepare. It is my favorite form of comfort food- noodles, veggies, and kimchi. As usual, I pieced together several recipes so I can't take full credit for the dish. The picture is a bit sloppy due to hunger and my old clunker of a camera.
Sesame Noodles
The measurements will vary on how much you make. I am going to base it on 1 serving, since I usually just make a small bowl for me.
1 serving of udon noodles (dried or fresh), the amount would be about 1 1/2 in. in diameter if dried
2 cups frozen Asian stir fry veggies (I like the one with edamame.)
1 tbsp sesame seed oil
1 tbsp good soy sauce
1/2 cup chopped kimchi
Cook udon noodles until chewy all the way through. At the same time, stir fry veggies with just a little olive oil and water to be sure they heat and cook. You don't want mushy, watery, or oily veggies. Once both are done, mix noodles, veggies, sesame seed oil, soy sauce, and kimchi all together in a bowl. You can add as much soy sauce and sesame seed oil as you want if you need a stronger flavor. I usually like it pretty light. See! Easy and so very good!
Wednesday, July 9, 2008
Simply Tomatoes
Just a quick post today. I had leftover grape tomatoes and wanted to do something a little different with them. I normally just throw them raw into a salad since they're sweet all alone. However, this time I sauteed them in a pan with some extra virgin olive oil and a couple pinches of dried oregano and sea salt. What a great combination! Add them to salads, pastas, or just have them as a side dish.
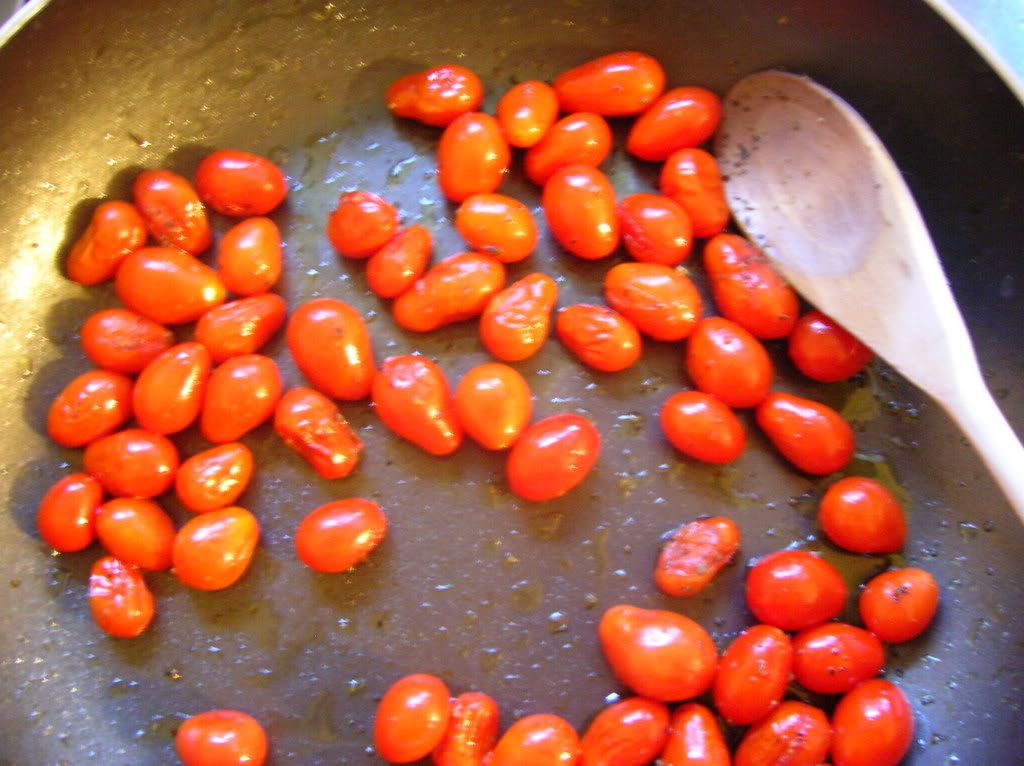
Grape Tomatoes with Oregano
a cup or two of grape tomatoes
couple turns of extra virgin olive oil
couple turns of extra virgin olive oil
pinch or two of sea salt
a few pinches of dried oregano
Saute grape tomatoes in a pan with the rest of the ingredients over medium heat for about 10-15 minutes. You know they're done when the tomatoes just start to soften and blister.
Tuesday, July 1, 2008
First Attempt
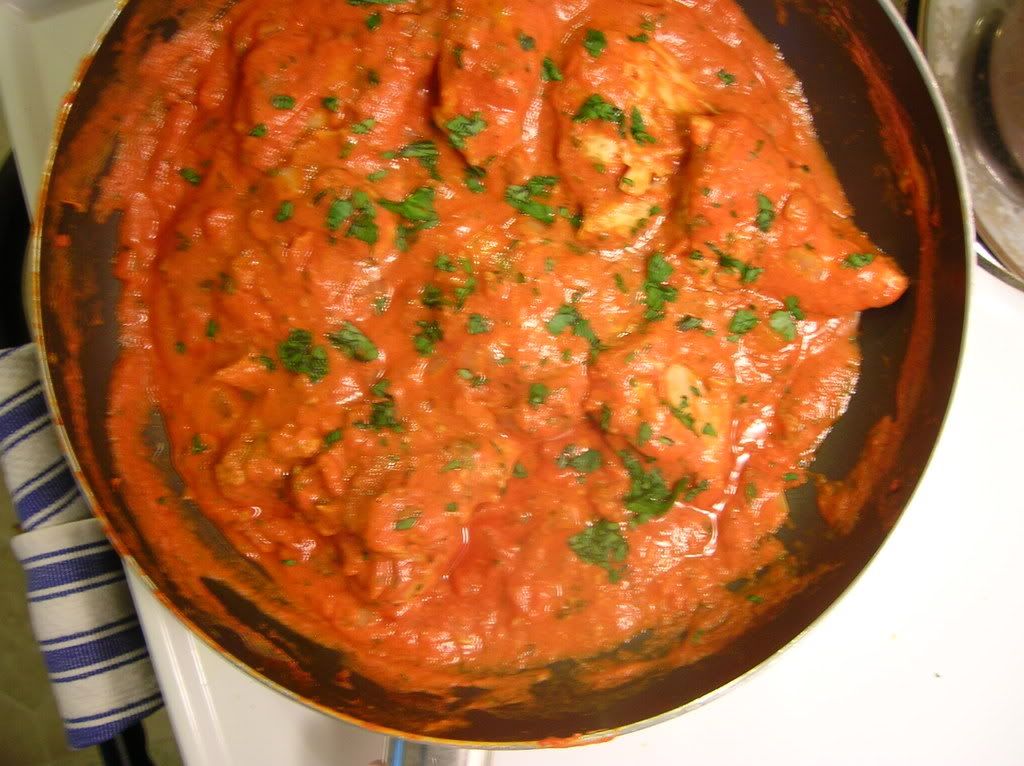
I've been having weird cravings lately- crunchwraps from Taco Bell, turkey burger with extra pickles, gummy bears, and Indian food. No, I'm not pregnant, but you'd think it by the strange combination of things I've wanted to eat. I did eat a crunchwrap over the weekend (check!), which I know doesn't follow my buy real and organic food diet. Whatever, life is too short anyway. The Indian food I attempted to fix on my own. I've been wanting to dabble in making more Asian and Indian dishes since that is an area of cooking I have not really explored. A and I love Indian food and sadly we can't get very good Indian food in Florida like we could in Boston. (We had our very first date at an Indian restaurant!) So to remedy this and not spend money going out all the time, I attempted to make Chicken Tikka Masala. I say "attempted" because it was a mish mash of four different recipes and it didn't taste like restaurant quality. The picture isn't a good representation since it tasted much better than the way it looks in the picture. I wanted to take a picture of it "plated" but forgot in my hunger. Enjoy! It's worth trying with shrimp, tofu, or veggies too!
4 large skinless, boneless chicken breasts or thighs
For the sauce:
Tikka Masala- style Chicken
For the marinade:
4 large skinless, boneless chicken breasts or thighs
1 cup yogurt (low fat or Greek-style work best)
1 1/2 tsp garam masala
1 tsp cumin
1 tsp cayenne
1 tsp ginger (freshly grated or powder)
1 tsp turmeric
a few good pinches of salt and pepper
Mix all the spices into the yogurt. In a large ziplock bag, mix the chicken and the yogurt marinade. Let it marinade in the fridge for at least 4-6 hours (overnight if possible). When ready to cook the chicken. place in a baking dish (discarding any left over marinade) and bake at 400 degrees for about 20-30 minutes until chicken is cooked through. You can also cook it out on the grill too!
For the sauce:
1 8 oz can tomato sauce
2/3 small can (4 oz) of tomato paste
1 small onion, diced
2 cloves finely minced garlic
1 1/2 tbsp fresh lemon juice
1 1/2 tbsp garam masala
1 tsp ginger
1 tsp cayenne
1 pinch cumin
1 tbsp butter
1 tbsp olive oil
1/2 cup of whipping cream
2-3 tbsp fresh chopped cilantro
Over medium heat, brown the onion using butter and olive oil. Add in the minced garlic toward the end to brown, making sure it doesn't burn. Add tomato sauce and tomato paste. Once it is thoroughly mixed and starting to heat through, add lemon juice, garam masala, ginger, cayenne, and cumin. Cook at medium low heat for 15-20 minutes. Add in the whipping cream and chicken. Cook for another 15-20 minutes. Sprinkle fresh cilantro right before serving. Goes great with brown or basmati rice.
Friday, June 27, 2008
Two-fer
Or is it two-for? Either way, since I've been a bit absent I'm providing several tasty recipes in one post. That's right! A two-fer (two-for, whatever you prefer)! The hubby and I just came back from a wonderful trip to Key West where we ate and drank and soaked up the sunshine. It was very relaxing and much needed! I thought I'd be so tired from the whirlwind Keys mini vacation to actually cook something, but I wasn't.
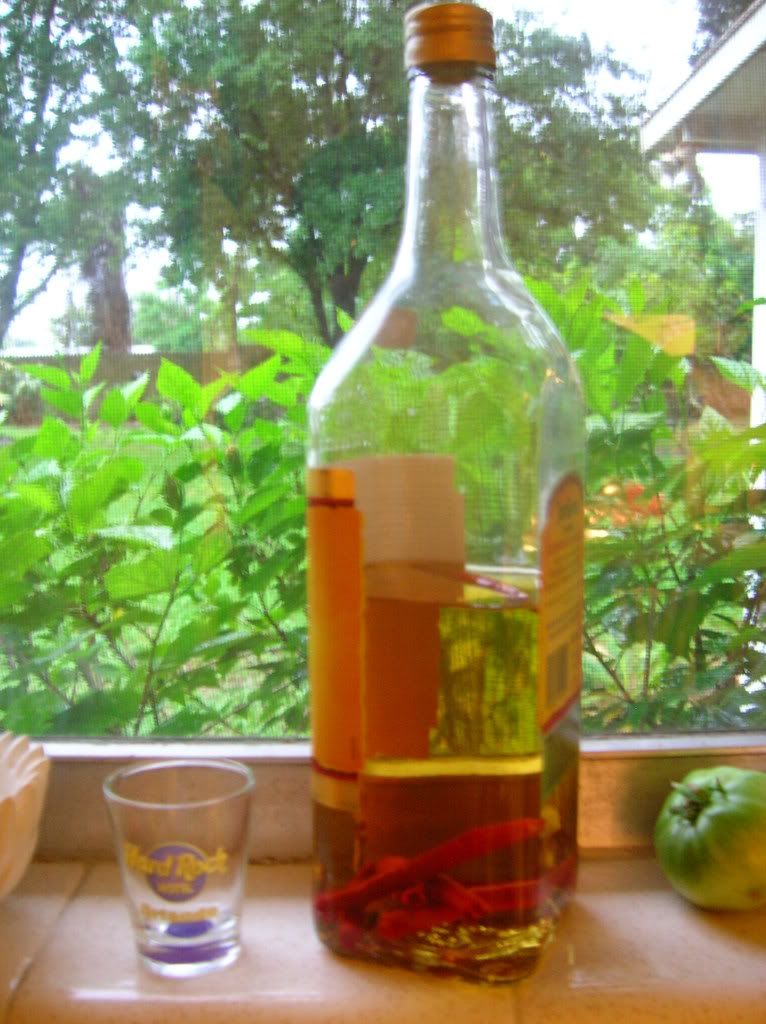
Wait! Before I go into that recipe, let me show you the beautiful red chile-infused tequila that I made for our friend's birthday margaritas. These were one of the best margaritas I've had in a long time. I make guava margaritas at home, but using the red chile-infused tequila just gave it that special touch. You can find the very easy recipe here.
The next recipe for you are these tasty Greek flat bread "things" I put together. Instead of grilled chicken (which I've done before) I used chicken meatballs just for a change. They were VERY good and made even better by the accompaniment of homemade tzatzki sauce and feta.
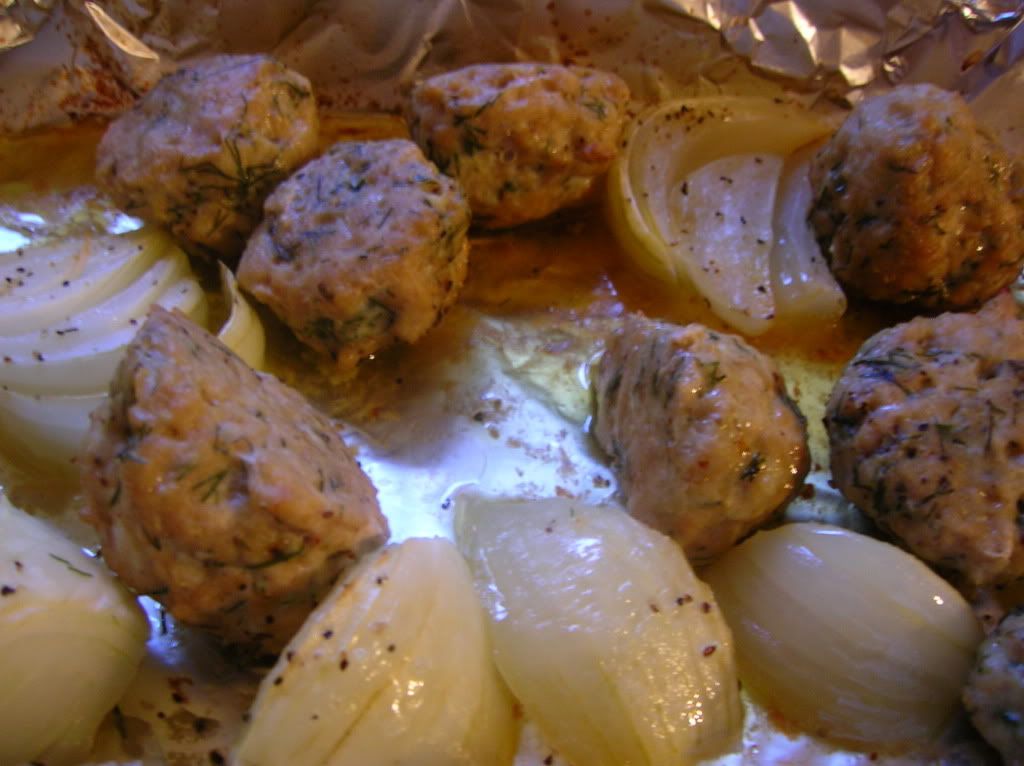
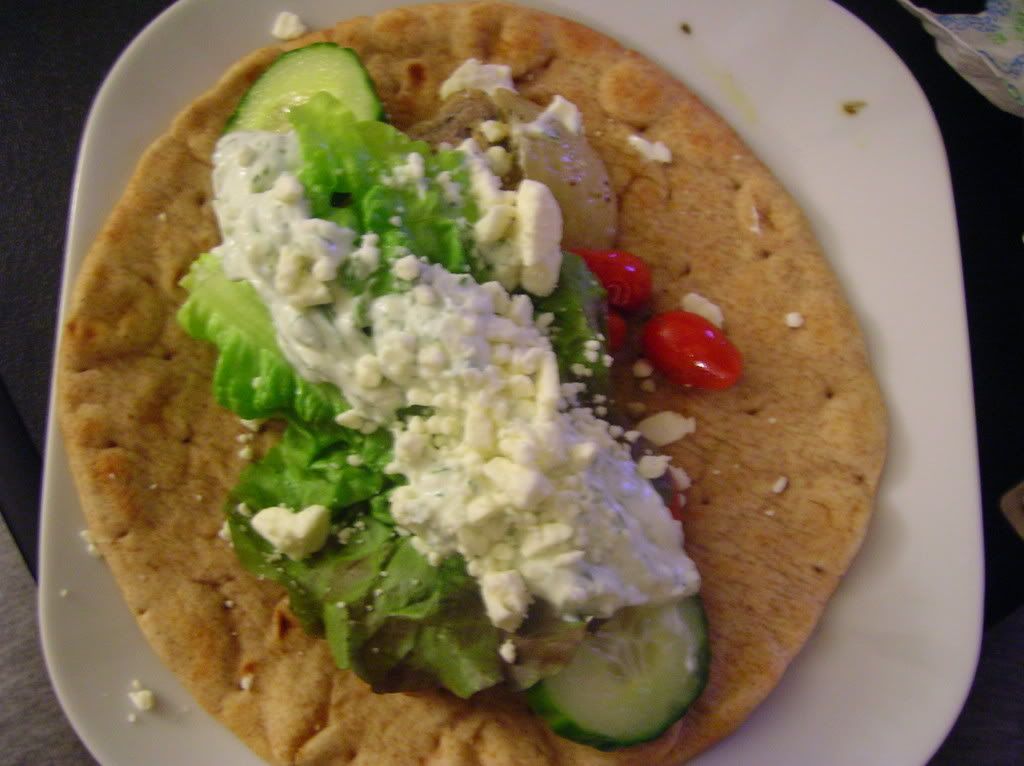
Greek-Style Chicken Meatballs
1 lb ground chicken
2 tbsp chopped fresh dill
1 1/2 tsp dry oregano
1 tsp poultry seasoning
1 tsp turmeric
2 cloves or minced garlic (I usually mince it with a microplane so it's really fine)
1 tsp lemon zest
a couple pinches of salt and pepper
1 small onion cut in wedges
Preheat oven to 400 degrees. Mix all the ingredients with the ground chicken. On a tin foil lined baking dish, place meat balls about 1 in apart. Place onion wedges between the meatballs. Drizzle it all with olive oil and bake for about 30-40 minutes until meatballs are cooked through and onion wedges are browned.
Homemade Tzatzki Sauce
I make mine with a lot of garlic since I like the bite and heat of the garlic. Use less garlic or even roasted garlic for milder flavor.
1 7 oz tub of Greek yogurt (whole, low fat, or nonfat all work)
2 large cloves of minced garlic
1 1/2 tbsp of lemon juice
2-3 tbsp of fresh chopped dill
salt to taste
Mix it all up and serve! It works great on sandwiches and for a veggie dip too!
Monday, June 16, 2008
Another Dessert...
I know I said no more dessert, but this recipe came out so well I just had to share. For the exception of what seems like an endless amount of dessert posts, I do not claim to be a dessert maker. I have only recently been "practicing" my baking and dessert making skills, and thankfully I've been having some mild success. I can't take any of the credit since the recipes that have really turned out best are thanks to my little Gourmet mini paper cookbook. This upside down berry cake was delicious and probably one of the easiest things to make! It would be perfect for a Fourth of July picnic, and you can substitute just about any fruit for the berries.
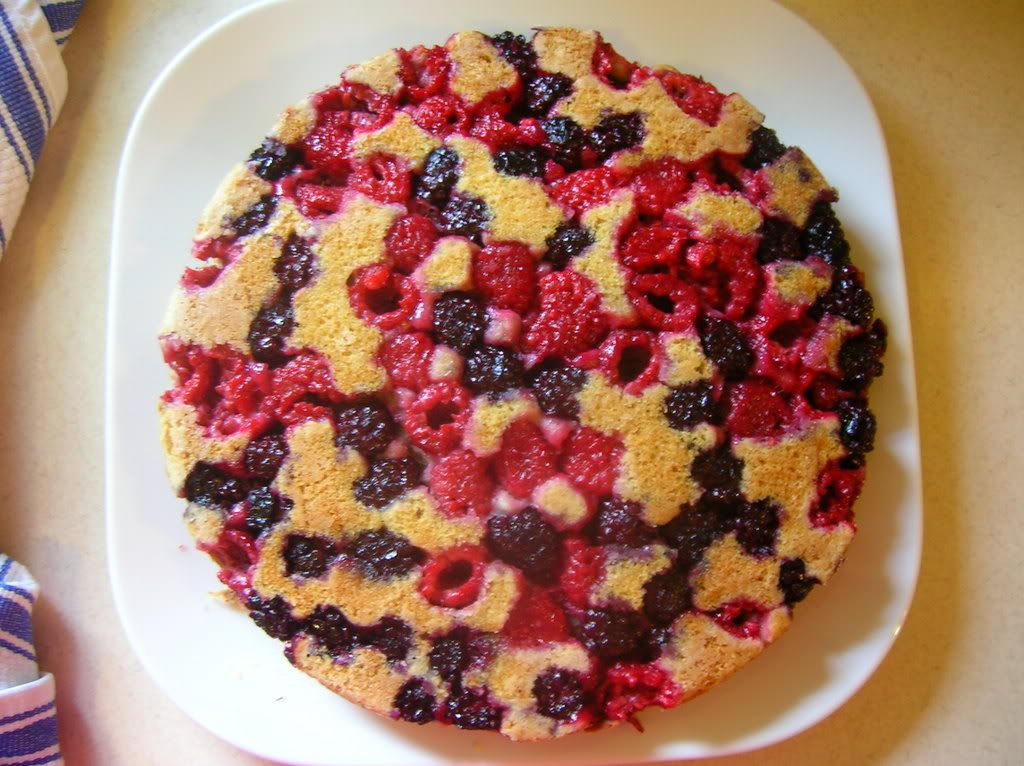
I used a mixture of blackberries and raspberries.
Gourmet
Just click the link for the recipe. Why retype it when someone has already done the work, right?
Wednesday, June 11, 2008
A Little of This and a Little of That
I'm starting to see a pattern. It's a good pattern. With food costs going up more and more each day (I will not grumble about this here), I've learned to really cut back. My "cut backs" though are not in the way I buy my food. I've always been pretty thrifty and a big label reader- one skill I can say I have out of many I don't. I walk up and down comparing prices and ingredients to get the most bang for my buck. It takes me more than an hour and a half to do my shopping. Anyway, back to my point, my cut backs are how I use my groceries. I've been trying to think outside the box on how to use up every little bit of leftover from various meals that sit inside my fridge. Usually, I would just throw them out after awhile. These days I turn them into meals (see last posting).
I'm forever making tacos in our house. It's easy and cheap. If the leftovers aren't eaten or turned in taco salad (great for lunch the next day), then I turn them into stuffed peppers! These peppers were filling, so only half a pepper per person is needed. It was such a great way to change the pace in our house!
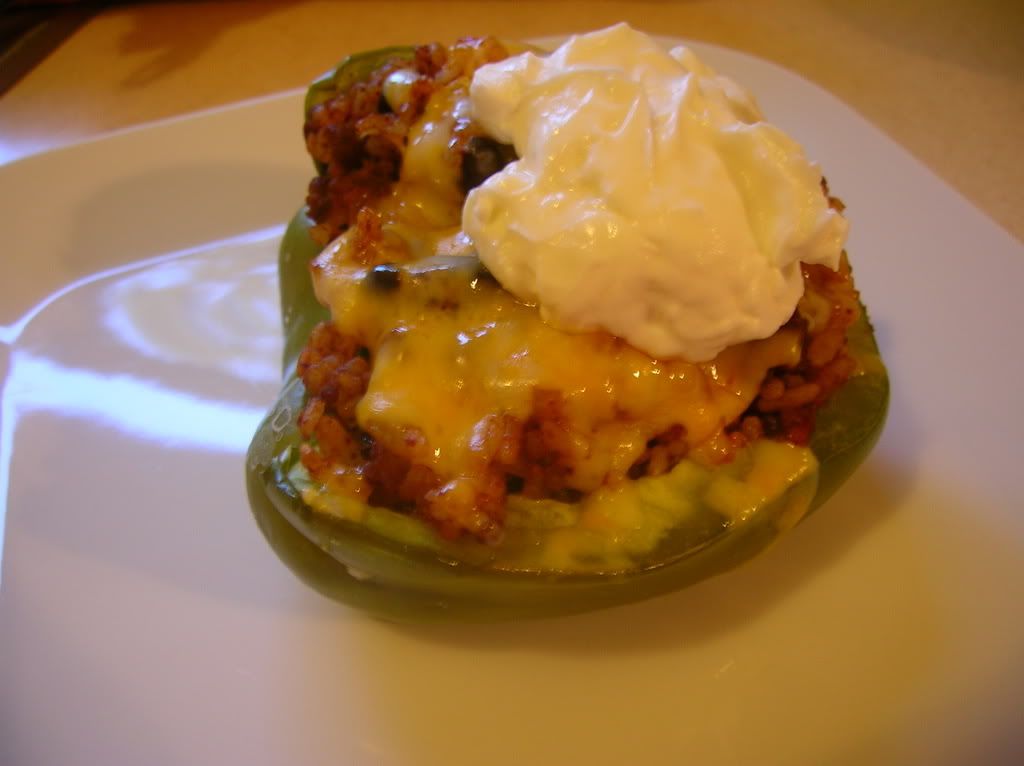
Southwestern Stuffed Peppers
for 4 stuffed peppers
This recipe can vary depending on how much leftover you actually have.
2 cups leftover taco meat (we use ground turkey mixed with a can of black beans)
2 cups leftover Spanish rice
1 small onion, diced
2 cloves of garlic, diced finely
2 cups (depending on how much leftovers you have and how many peppers you are making) of Monterrey jack cheese (or whatever you have on hand)
1 cup (depending on how much leftovers you have and how many peppers you are making) of good quality salsa
handful of chopped scallions
2 large green (or red) peppers sliced
In a skillet, brown onion and garlic in about tbsp of olive oil. Add leftover taco meat, leftover Spanish rice, and salsa. Heat all the way through. Slice green peppers in half and clean out the seeds and spine on the inside. Spray the outside of the peppers with olive oil and stuff the peppers with the meat and rice mixture. Place on a foil lined baking sheet. Bake at 375 degrees for about 15 minutes or until green peppers are slightly soft to the touch. Top with cheese and bake for another 10 minutes until cheese is melted. Top with scallions and a spoonful of sour cream.
Note: You can add just about anything to this mixture- avocados, more beans, any other leftover veggies. It's very versatile!
I'm forever making tacos in our house. It's easy and cheap. If the leftovers aren't eaten or turned in taco salad (great for lunch the next day), then I turn them into stuffed peppers! These peppers were filling, so only half a pepper per person is needed. It was such a great way to change the pace in our house!
Southwestern Stuffed Peppers
for 4 stuffed peppers
This recipe can vary depending on how much leftover you actually have.
2 cups leftover taco meat (we use ground turkey mixed with a can of black beans)
2 cups leftover Spanish rice
1 small onion, diced
2 cloves of garlic, diced finely
2 cups (depending on how much leftovers you have and how many peppers you are making) of Monterrey jack cheese (or whatever you have on hand)
1 cup (depending on how much leftovers you have and how many peppers you are making) of good quality salsa
handful of chopped scallions
2 large green (or red) peppers sliced
In a skillet, brown onion and garlic in about tbsp of olive oil. Add leftover taco meat, leftover Spanish rice, and salsa. Heat all the way through. Slice green peppers in half and clean out the seeds and spine on the inside. Spray the outside of the peppers with olive oil and stuff the peppers with the meat and rice mixture. Place on a foil lined baking sheet. Bake at 375 degrees for about 15 minutes or until green peppers are slightly soft to the touch. Top with cheese and bake for another 10 minutes until cheese is melted. Top with scallions and a spoonful of sour cream.
Note: You can add just about anything to this mixture- avocados, more beans, any other leftover veggies. It's very versatile!
Monday, June 9, 2008
Back to Business
Okay...I fully admit that I've been lazy this past weekend. Well, really it's been a month of eating lots of pizza and tacos and pasta, then travelling and being sick in between them all. We actually ate a good share of spaghetti and I usually had leftovers sitting around for a few days. Don't get me wrong...leftovers are great! They're especially great when you need to take something to work for lunch each day. What I don't like is eating the same meal again for dinner the next night. I'm high maintenance like that.
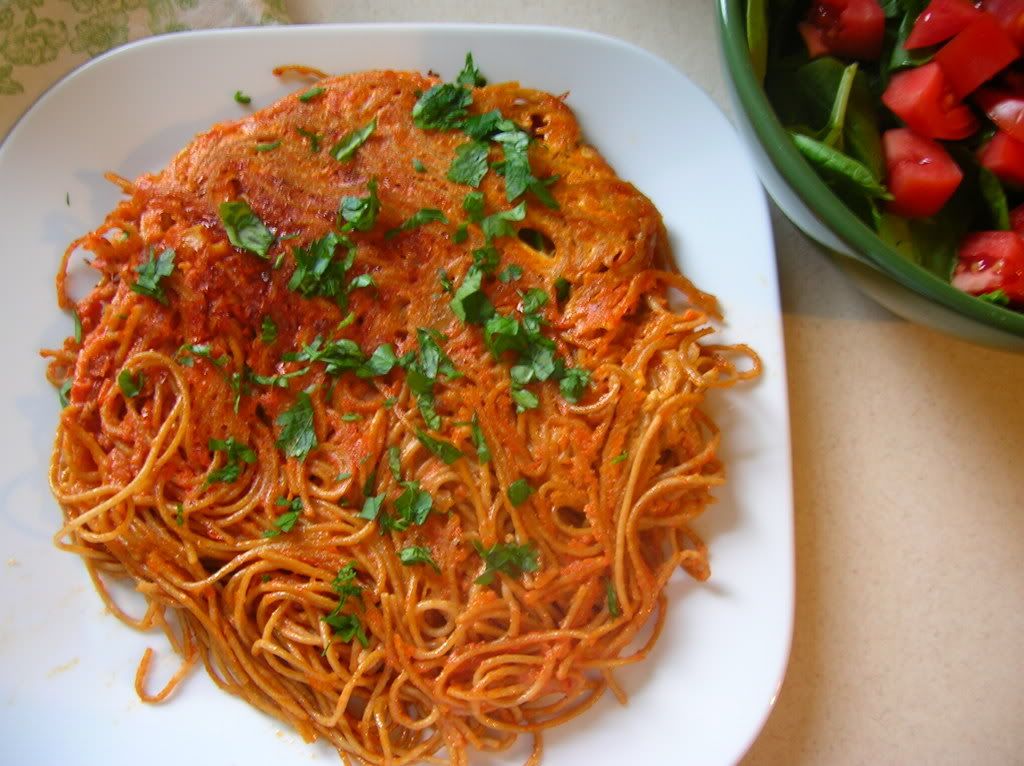
So what do you do with leftover spaghetti? Turn it into spaghetti pie! I've seen this recipe done by several Food Network folks. I just combined them all to make this one. It is such a great (and cheap) way to use up leftover pasta!
Leftover Spaghetti Pie
your leftover spaghetti
1 egg, beaten
1-2 cups (depends on how much leftovers you have) of mozzarella cheese and Parm cheese together (or Italian cheese blend)
chopped basil or Italian flat leaf parsley for the top
In a big zip lock bag mix the egg and cheese together with the leftover pasta. Shake around the zip lock to make sure everything is coated. Over medium heat, put in the spaghetti mixture so that it is a flat and rounded pile in a non-stick or very well-oiled (olive oil, of course) large pan. Don't touch it! Let it cook in the pan for about 10-15 minutes, or until the bottom is brown and crusty (the cheese and egg will bind it together for you). Then, place a large plate or cutting board over the pan and flip the pan over. The top will now be at the bottom of the plate/ cutting board and the browned part will be at the top. Carefully slide the pie back on to the pan so you can brown the other side (another 10 minutes or so). When it's done put onto a plate, top it with chopped herbs, and cut in slices.
Wednesday, June 4, 2008
Back in the Kitchen
I have a few recipes to post in the next couple of days. I've been sick and traveling, but now I'm back to my normal life. I know all you five readers out there were wondering what happened ;) Some delicious meals are coming your way- no desserts for a bit, promise!
Wednesday, May 7, 2008
Happy Mother's Day...with Jello
I know it looks as if I've made nothing but desserts, but really, I do eat actual meals. This past month (or two) I've been trying to eat up everything that's been lingering around the pantry and the freezer in order to save some money at the grocery store. I've made a few creative meals...creative in that I think, "Wow! That was all pretty random, but tasty." I've had a box of strawberry jello in the pantry for months now. Who bought the strawberry jello? I don't know. I believe it was a purchase made when my mom started her chemo back in fall. I have nothing against jello. It's brightly colored and jiggly and reminds me of candy. So, instead of making jello (or jello shots, which are tempting when you've had a rough week) I went back again to a childhood recipe that my mom made for holidays and special events.
When I was young, my family didn't have a lot of money and I had VERY young parents. My mom was a young mother who was learning to cook while she was learning to be a parent and a wife. So, this recipe is VERY simple but, in my eyes, still one of my favorite desserts since it reminds me of her. This is actually best with lime or lemon jello, but the strawberry worked just fine. Hey! And it's pink for breast cancer awareness!
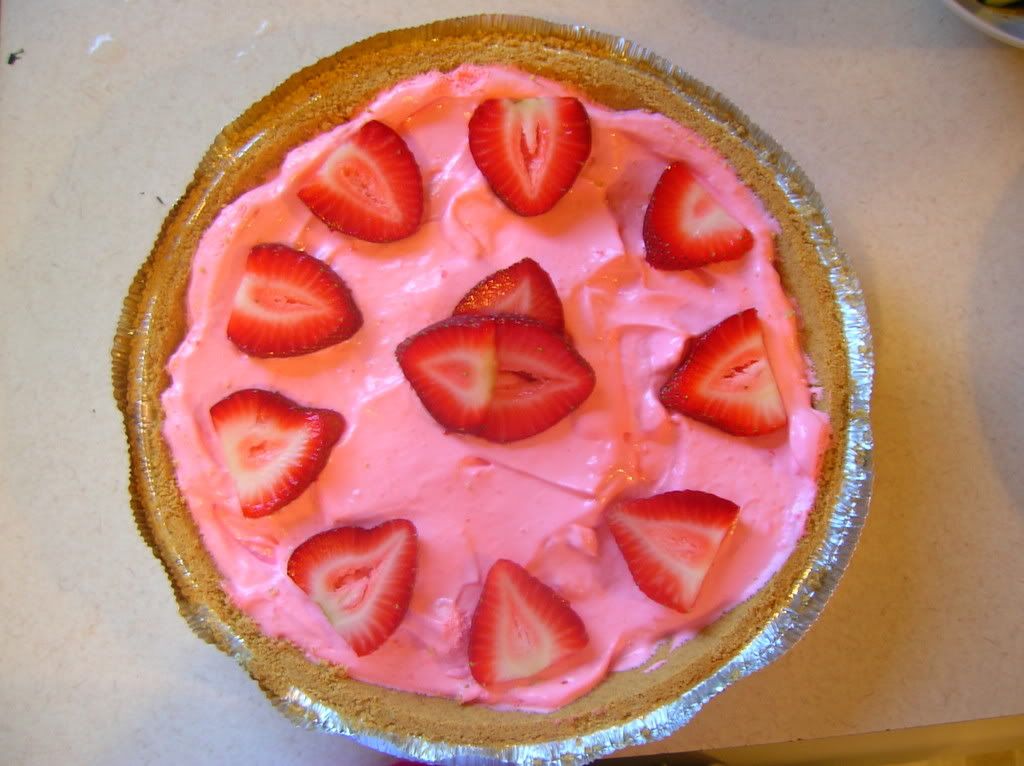
Strawberry Jello Pie
1 small box of strawberry jello
1/4 cup boiling water
1/4 cup room temp water
1 tub lite cool whip
1 premade graham cracker crust
fresh strawberries for the top
Mix the box of jello with 1/4 cup boiling water to dissolve. Once all dissolved, add 1/4 cup room temperature water (or less if it looks to watery) and mix well. Let it cool back to room temp if it's too hot. Fold the liquid jello into the the cool whip slowly. Once it is all mixed together, scoop into your crust and put it in the fridge to set. Add fresh strawberries and serve! It tastes like a quick strawberry mousse...light and fluffy!
When I was young, my family didn't have a lot of money and I had VERY young parents. My mom was a young mother who was learning to cook while she was learning to be a parent and a wife. So, this recipe is VERY simple but, in my eyes, still one of my favorite desserts since it reminds me of her. This is actually best with lime or lemon jello, but the strawberry worked just fine. Hey! And it's pink for breast cancer awareness!
Strawberry Jello Pie
1 small box of strawberry jello
1/4 cup boiling water
1/4 cup room temp water
1 tub lite cool whip
1 premade graham cracker crust
fresh strawberries for the top
Mix the box of jello with 1/4 cup boiling water to dissolve. Once all dissolved, add 1/4 cup room temperature water (or less if it looks to watery) and mix well. Let it cool back to room temp if it's too hot. Fold the liquid jello into the the cool whip slowly. Once it is all mixed together, scoop into your crust and put it in the fridge to set. Add fresh strawberries and serve! It tastes like a quick strawberry mousse...light and fluffy!
Monday, April 28, 2008
Little Treats from Childhood
One of the things I miss most about Hawaii is the food. I don't necessarily mean Hawaiian food, but rather food that instantly takes me back to childhood. There are certain things I miss- "fast food" sushi (as I refer to it) from Kozo, rainbow shaved ice from the little stand in Nuuanu, and even Zippy's saimin and mac salad. All of these remind me of home. Another place I miss in Hawaii is Shirokiya, a Japanese department store that sells everything from electronics to food products to Hello Kitty. It also has a french bakery that sells some of the best sweets in town- including my favorite palmiers. Palmiers are so simple to make and very versatile. You can make them sweet or savory just by adding different seasonings and spices. The ones I made below are cinnamon and sugar, which were my favorite as a keiki (child).
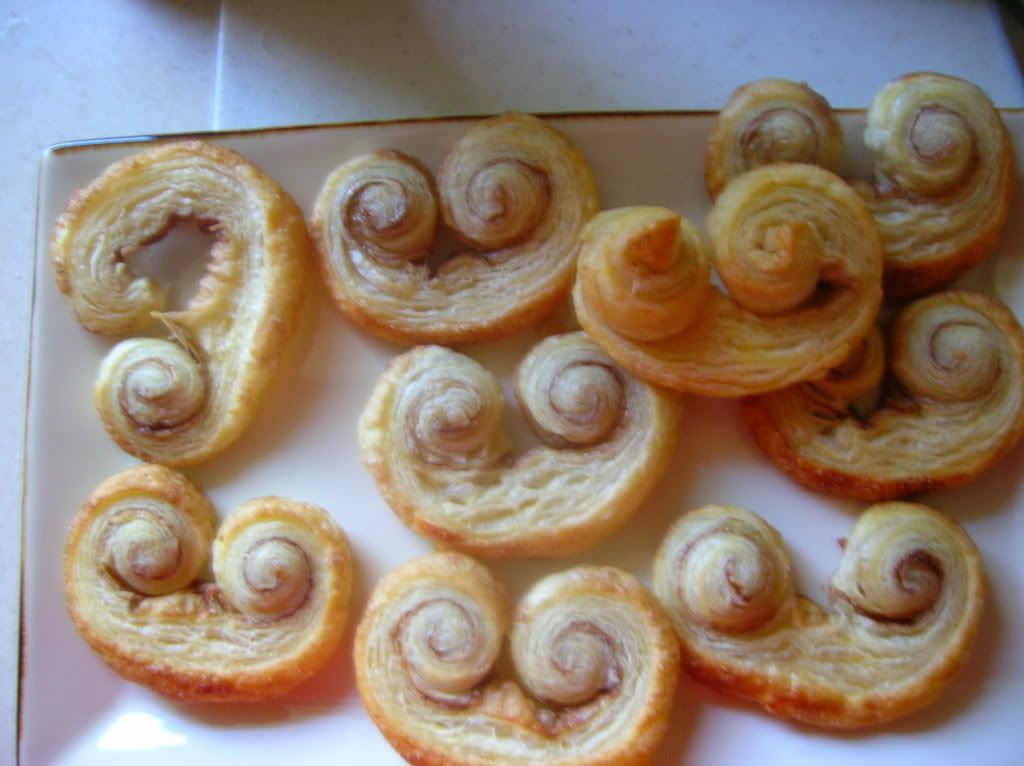
Palmiers (easy version)
1 sheet of puff pastry
1/2 cup sugar
1/2 cup cinnamon
1 egg, beaten
Spread the sheet out. Brush egg wash on one side and sprinkle with cinnamon and sugar. Turn over and do the same to the other side. Take one side of the puff pastry and roll it to the center. Take the other side and roll it to the center. Wrap in parchment paper and put in the freezer for about 10 minutes to harden. Don't unravel, but cut the log into 1/2 inch heart-shaped pieces. Brush tops with egg wash and sprinkle again with sugar and cinnamon. Bake according to puff pastry box directions. Keep an eye on them so they brown and don't burn!
**This can easily be savory by swiping pesto instead of egg and adding Parmesan cheese to the inside and on top of the cookies (before you bake). Really, add anything you think could taste yummy!
Monday, April 21, 2008
For Those Nights
These days I am either really busy or just not busy enough. However, there is one thing that will always make me feel better on a long day- food. A good meal is a way to my heart and a sense of relief. Therefore, on busy nights, any dinner I can make in 30 minutes with minimal ingredients is perfect. AND, if the leftovers turn into a second meal the next day, that is even better. This recipe has been a go-to in my family since I was a child. It has always been one of my favorite meals not only for the ease, but it is really pretty good. If you have any shrimp and dressing leftover, toss it with some warm whole wheat pasta for a second dinner.
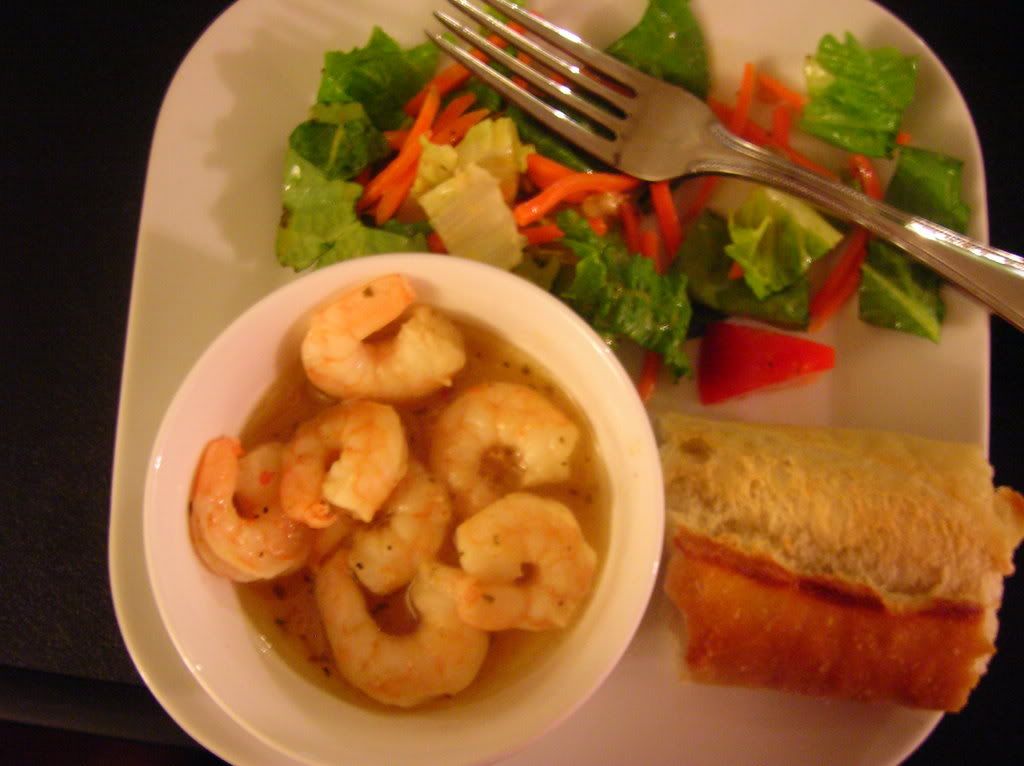
Italian Shrimp
1 bag frozen cleaned, shelled, and tail on (if you like) shrimp- thawed
2-3 cups of good Italian dressing (I like Newman's Parm Italian or Kraft Tuscan Italian)
1 good crusty french baguette (for mopping)
Place thawed shrimp in a glass baking dish with the Italian dressing and cook at 375 degrees until shrimp is pink and ready. Serve with bread and a side salad. Bread is perfect for mopping up the dressing!
Told you it was easy!
Thursday, April 17, 2008
Baby Steps
Lately, I've been trying to bake a bit more- cookies, cakes, and now breads. I've never been a good baker...even with a box mix. I would like to blame my stove for not providing the proper even heat, but I do think some of it has to do with me. The more I practice though, the better I am becoming. Cooking comes more naturally to me in that it isn't a precise science. I can cook by taste and instinct rather than by measuring out ingredients. Baking requires me to measure everything out very carefully since a pinch too much of something can throw the whole recipe off! Somehow, I did manage to make this focaccia and it didn't turn out too bad.
My changes: I used a russet potato instead of yukon and used roma tomatoes instead of cherry.
My changes: I used a russet potato instead of yukon and used roma tomatoes instead of cherry.

Potato Focaccia
taken directly from The Wednesday Chef
Makes one 8-inch focaccia
1 medium Yukon Gold potato
2 cups all-purpose flour, plus more as needed
1 teaspoon fresh yeast
A pinch of sugar
1 1/2 teaspoons salt, plus more for salting water
2/3 cup warm water
3 tablespoons extra-virgin olive oil
1/2 pint of cherry or grape tomatoes, sliced crosswise
1 to 2 teaspoons dried oregano
Coarse sea salt
1. Wash the potato and place in a small saucepan along with enough water to cover the potato by an inch. Place the pot over high heat, covered, and bring to a boil. Add a handful of kosher salt to the water. Simmer until the potato is tender when pierced with a knife, around 20 minutes. Drain the potato and let it cool. Peel the potato and mash finely with a fork. Set aside.
2. Put the yeast in a large mixing bowl along with a pinch of sugar. Add the warm water in a thin stream over the yeast, using a fork to help dissolve the yeast entirely. Let the mixture stand for a few minutes.
3. Pour the flour into the yeast water and stir with a fork, then add the mashed potato and the salt. The dough will be relatively thick and shaggy. Use the fork to incorporate the potato into the flour. Add 2 tablespoons of olive oil and begin to knead the dough by hand. It will come together quite quickly. Knead against the bowl for a minute or so, until it is relatively smooth. Add more flour if the dough is too sticky to handle. Form the dough into a ball and let it rest, covered with a kitchen towel, in the bowl for an hour.
4. Cut a piece of parchment paper to fit the bottom of an 8-inch cake pan. Using your fingertips, gently release the puffy and risen dough from the bowl and place it in the cake pan. Gently tug and pat it out so that it fits the pan. Cover the top of the focaccia with the tomato halves, distributing them evenly. Sprinkle the oregano and a large pinch of coarse salt over the tomatoes, drizzle with the remaining tablespoon of olive oil, and let it rest for another hour.
5. While the focaccia is resting, preheat the oven to 425 degrees. Place the cake pan in the oven and bake for 40 minutes, rotating the pan halfway through. Let cool on a rack for 20 minutes before removing the focaccia from the pan.
Tuesday, April 8, 2008
Everything That's Good in a Cookie
That's right...two posts in the same week! WOW! You can tell that the sweet tooth took control last month. I think I have already expressed my undying love for both the cookie and the cupcake. However, I never knew how much I loved the former until it was joined in marital bliss with bittersweet chocolate, cherries, and oats. Who needs a boring oatmeal cookie when you can have these heavenly ones! The tartness of the cherries were perfect for the sweet chocolate. The oats gave them some body and BAM! (in the words of Emeril). Just such a treat.
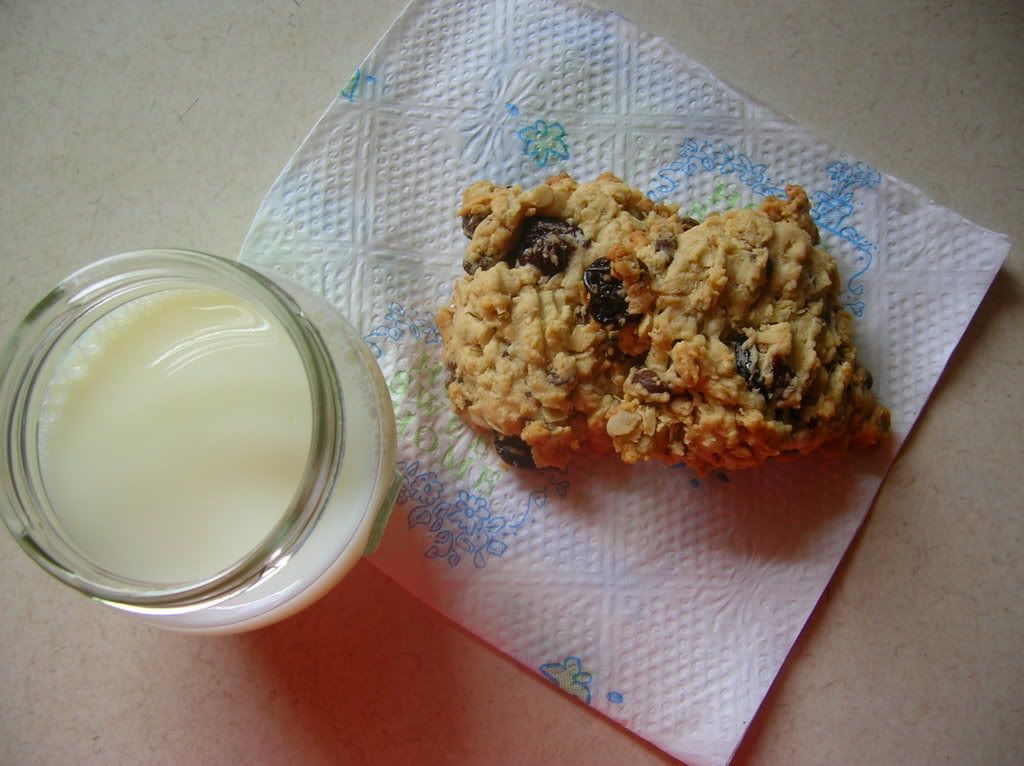
Makes about 2 1/2 dozen cookies.
1. Preheat oven to 350°. Line two baking sheets with parchment paper; set aside. In a large bowl, sift together flour and baking soda.
2. In the bowl of an electric mixer fitted with the paddle attachment, cream the butter and both sugars on medium speed until light and fluffy, 2 to 3 minutes, scraping down the sides of the bowl once or twice during mixing. Add the egg; mix on high speed to combine. Add the vanilla; mix to combine. Scrape down the sides of the bowl.
3. Add flour mixture to egg mixture, and mix on low speed until well combined. Add the oats, cherries, chocolate, and toffee pieces; mix to combine after each addition.
4. Spoon a heaping tablespoon of dough onto a lined baking sheet. Repeat, spacing 2 inches apart.
5. Bake cookies until golden brown, 14 to 16 minutes, rotating baking sheet halfway through. Transfer to a wire rack.
My small changes to the recipe: I didn't add the toffee bits since I just thought it would be too overwhelming, and I cut the sugar by about half. I don't like my cookies too sweet, and these changes made them perfect for me!
Torie's Cherry Chocolate-Chunk Cookies
(directly taken from Martha Stewart)
1 1/2 cups all-purpose flour
1 teaspoon baking soda
1/2 pound (2 sticks) unsalted butter, room temperature
3/4 cup packed light-brown sugar
3/4 cup granulated sugar
1 large egg
1 teaspoon pure vanilla extract
1 1/2 cups oats
1 cup dried cherries
4 1/2 ounces bittersweet chocolate, coarsely chopped
1 cup toffee pieces
1 teaspoon baking soda
1/2 pound (2 sticks) unsalted butter, room temperature
3/4 cup packed light-brown sugar
3/4 cup granulated sugar
1 large egg
1 teaspoon pure vanilla extract
1 1/2 cups oats
1 cup dried cherries
4 1/2 ounces bittersweet chocolate, coarsely chopped
1 cup toffee pieces
Makes about 2 1/2 dozen cookies.
1. Preheat oven to 350°. Line two baking sheets with parchment paper; set aside. In a large bowl, sift together flour and baking soda.
2. In the bowl of an electric mixer fitted with the paddle attachment, cream the butter and both sugars on medium speed until light and fluffy, 2 to 3 minutes, scraping down the sides of the bowl once or twice during mixing. Add the egg; mix on high speed to combine. Add the vanilla; mix to combine. Scrape down the sides of the bowl.
3. Add flour mixture to egg mixture, and mix on low speed until well combined. Add the oats, cherries, chocolate, and toffee pieces; mix to combine after each addition.
4. Spoon a heaping tablespoon of dough onto a lined baking sheet. Repeat, spacing 2 inches apart.
5. Bake cookies until golden brown, 14 to 16 minutes, rotating baking sheet halfway through. Transfer to a wire rack.
Monday, April 7, 2008
Sweets for my Sweets
It's already April and I'm ready for a new month. I can't say March was great because it wasn't, but I'm willing to let it go in hopes that April showers will bring new (and better) things. A new garden is growing in my yard and it's already sprouting a few flecks of green. That's already a good sign! While I wait, I'm willing to indulge in some sweet treats. Sugar always makes things better...especially if it's accompanied by Nutella.

Chocolate Hazelnut Tart
(from Gourmet mag)
1 pre-made graham cracker crust (store bought or, if adventurous, you can make your own)
1 cup hazelnuts, chopped
1 cup heavy cream
10 1/2 oz. fine quality bittersweet chocolate (not unsweetened!) in chips or finely chopped
1/2 cup of Nutella
pinch of salt
In a sauce pan, heat the heavy cream to a light boil. In a heat-safe bowl, pour heated cream over chocolate and whisk until chocolate is melted. Add Nutella and salt, and whisk together until everything is combined. You can either add the hazelnuts in the mix so it's evenly distributed through the dish or add them on top (which is what I did). Pour chocolate filling into the crust and put in freezer until set (about 30 minutes). OR if you are going to eat later, put in the fridge until ready to serve. OPTIONAL: We had them with some sangria soaked strawberries on the side and that was a GREAT addition. It really cut through the richness of the chocolate.
Thursday, February 21, 2008
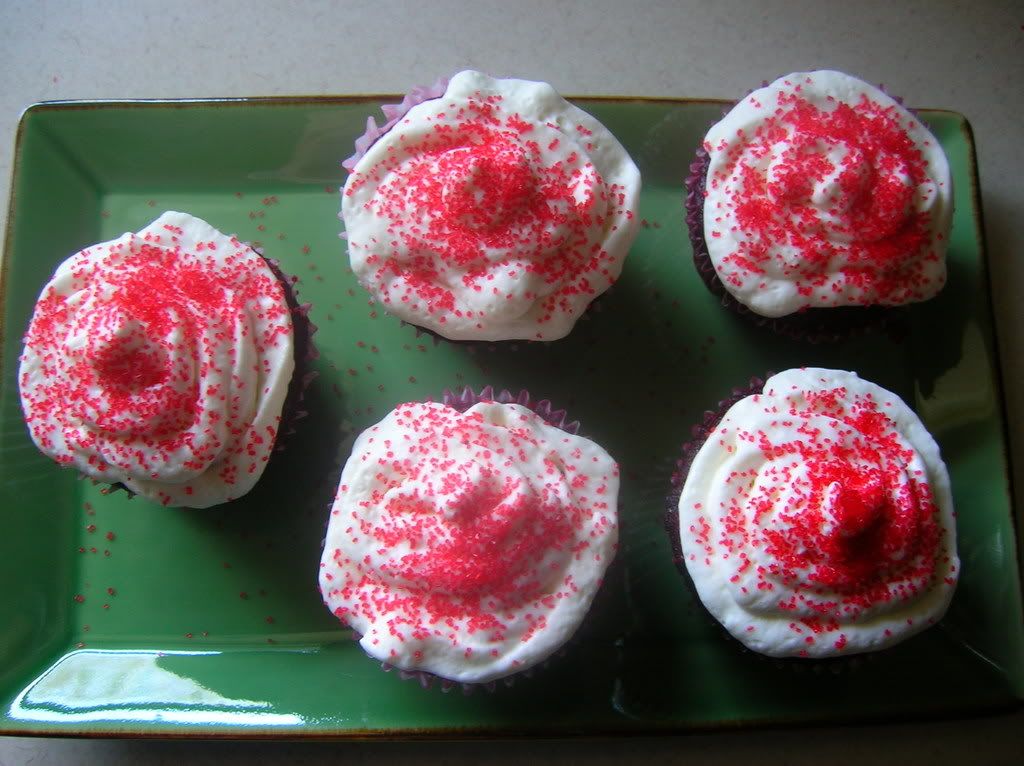
Such Lovely Cupcakes
There are several things I love about the South, and one of those things is the FOOD! I love Southern food, from BBQ to collard greens. Since I've been living here, I'm trying to make some Southern specialites. So, what better way to celebrate Valentines Day but with Red Velvet cupcakes! I found the recipe below from Desert Candy. However, as usual, I cheated due to lack of time. I made the cupcakes from a box mix (which was still pretty darn yummy) and did make the frosting below minus the mascarpone (since it wasn't in my local grocery store that day). All told- some of the best cupcakes I've ever had!
Red Velvet Cupcakes
recipe directly from Desert Candy (a GREAT blog)
This has a surprising amount of red food coloring in it, so make sure you have enough on hand before proceeding.
3½ cups cake flour
½ cup unsweetened cocoa (not Dutch process)
1½ teaspoons salt
2 cups canola oil
2¼ cups granulated sugar
3 large eggs
6 tablespoons (3 ounces, 1/4 cup plus 2 tbl) red food coloring
1½ teaspoons vanilla
1¼ cup buttermilk
2 teaspoons baking soda
2½ teaspoons white vinegar
1. Preheat oven to 350 degrees. Grease 3 round 9-inch layer cake pans and line bottoms with parchment.
2. Whisk cake flour, cocoa and salt in a bowl.
3. Place oil and sugar in bowl of an electric mixer and beat at medium speed until well-blended. Beat in eggs one at a time. With machine on low, very slowly add red food coloring. (Take care: it may splash.) Add vanilla. Add flour mixture alternately with buttermilk in two batches. Scrape down bowl and beat just long enough to combine.
4. Place baking soda in a small dish, stir in vinegar and add to batter with machine running. Beat for 10 seconds.5. Divide batter among pans, place in oven and bake until a cake tester comes out clean, 40 to 45 minutes. Let cool in pans 20 minutes. Then remove from pans, flip layers over and peel off parchment. Cool completely before frosting.
Whipped Mascarpone Frosting for Red Velvet Cake
2 cups heavy cream, cold
12 ounces cream cheese, at room temperature
12 ounces mascarpone
½ teaspoon vanilla
1½ cups confectioners’ sugar, sifted
1. Softly whip cream by hand, in electric mixer or in food processor. Cover in bowl and refrigerate.
2. Blend cream cheese and mascarpone in food processor or electric mixer until smooth. Add vanilla, pulse briefly, and add confectioners’ sugar. Blend well.
3. Transfer cream cheese mixture to bowl; fold in whipped cream. Refrigerate until needed.
Tuesday, February 19, 2008
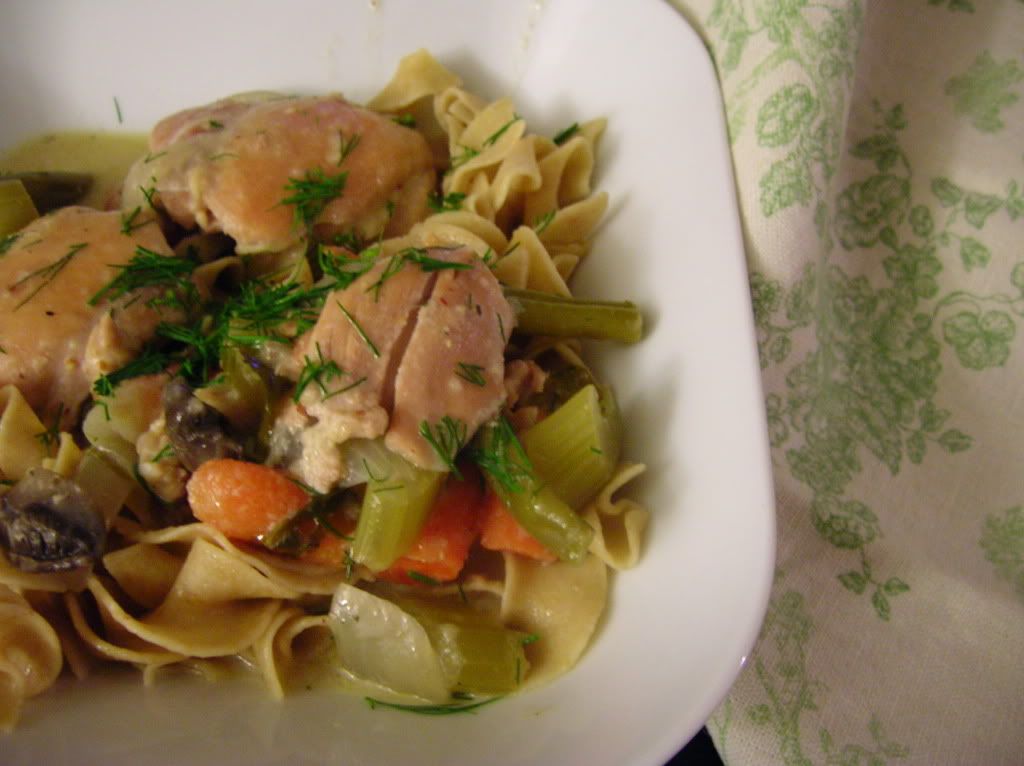
Sunday Meal on a Wednesday
There are days when I come home and just want to eat a bowl of soup and nothing more- easy, quick, satisfying. However, there are days when I want a meal- I mean a real meal that tastes like I actually put some effort into it. I've been making more of an attempt to try branching out a bit rather than making the usual dishes that I always linger toward. While watching Nigella make her "Coq au Riesling" I decided that I was going to attempt this dish. (Nigella always makes everything look so tasty!). I used Nigella's recipe as a base and made my own changes. I had to improvise a bit due to budget. Click on the "Nigella Express" link to go to her recipe (which I'm sure tastes fabulous!)
Coq au "Sauvignon Blanc"
inspired from Nigella's Express Coq au Riesling (Foodnetwork)
1 tablespoons garlic, minced
1 cup bacon, diced
1 small onion, diced
2 celery stalks, roughly cut
2 carrots, roughly cut
1 cup green beans
6 skinless and boneless chicken thighs
2 bay leaves
10 ounces mushrooms (baby bellas)
1/2 bottle white wine (I used Sauvignon Blanc since it was affordable)
1/3 cup chicken broth
Salt and freshly ground black pepper
Olive Oil
Flour
1 to 2 tablespoons freshly chopped dill leaves
Buttered egg noodles
Heat the oil in a casserole or large wide pan and fry the bacon bits until crisp. Drain out some of the oil, leaving about a tsp in the pan.
Add about a tablespoon of olive oil and the diced onions. Cook until softened and slightly carmelized.
Salt and pepper about 1/2 cup of flour, and lightly coat chicken in flour.
Add in chicken to pot and lighlty brown. (Again drain a bit of the oil/ fat once slightly brown.)
Add mushrooms, celery, carrots, green beans, wine, chicken broth, and bay leaves.
Season with salt and pepper and bring to boil.
Cover and simmer for an hour.
Sprinkle with freshly chopped dill and serve with buttered egg noodles.
*You can add whatever veggies you may have left in your fridge (as I did).
Tuesday, January 22, 2008
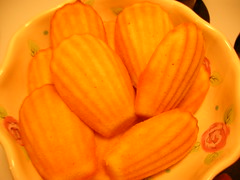
Je t'aime, Madeleine!
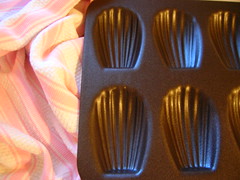
I have always felt that I must have some type of French ancestry somewhere since I love all things French. I love their food, lifestyle, wine, literature. I have been fortunate enough to visit Paris three times, and let me tell you, I can go there a hundred more. I miss the bustling city, the metro, the endless number of crepe stands, the open markets, the cafes...I really could go on. Every time I have been to Paris, I am always in search for the most yummy (or yummiest, if you prefer) madeleine cookies. The soft cake-like texture and their buttery sweetness make it one of my favorite desserts (well, let's be honest, they're really a snack for me). As mentioned before I received a madeleine cookie pan for Christmas and I finally was able to use them yesterday. I made about 20 cookies, all now waiting to be eaten by me with a cafe au lait in hand! They came out pretty good for a first attempt...not as pillowy soft as the ones I buy. However, they will fix the craving.
Madeleines
recipe copied directly from 101 Cookbooks.com
1 1/2 sticks unsalted butter (6 ounces)
2 tablespoons softened unsalted butter (for greasing pan)
3/4 cups unbleached all-purpose flour
4 large eggs
a pinch fine-grain sea salt
2/3 cups sugar
zest of one large lemon
1 teaspoon vanilla extract
powdered sugar
a bit of extra flour for dusting baking pan
2 tablespoons softened unsalted butter (for greasing pan)
3/4 cups unbleached all-purpose flour
4 large eggs
a pinch fine-grain sea salt
2/3 cups sugar
zest of one large lemon
1 teaspoon vanilla extract
powdered sugar
a bit of extra flour for dusting baking pan
Special equipment: A madeleine baking pan, regular or small
Preheat oven to 350 degrees Fahrenheit.
Melt the 1 1/2 sticks of butter in a small pot over medium heat until it's brown and gives off a deliciously nutty aroma, roughly 20 minutes. Strain (using a paper towel over a mesh strainer) - you want to leave the solids behind. [**NOTE: I did this and it didn't really strain...so I ended up just skimming the solids out with a spoon] Cool the butter to room temperature. By doing the butter first you can complete the rest of the steps while it is cooling.
While the melted butter is cooling, use the remaining 2 tablespoons of butter to grease the madeleine molds - get in there and make sure you get in all the ridges. Dust with flour and invert the pan tapping out any excess flour. Lanha uses "cooking spray" with flour to simplify this part.
Put the eggs with the salt in the bowl of an electric mixer with a whisk attachment. Whip on high speed until thick - you are looking for the eggs to roughly double or triple in volume - approximately 3 minutes. Continuing to mix on high speed, slowly add the sugar in a steady stream. Whip for 2 minutes or until mixture is thick and ribbony. Now with a spatula fold in the lemon zest and vanilla (just until mixed). Sprinkle the flour on top of the egg batter, and gently fold in. Now fold in the butter mixture. Only stirring enough to bring everything together.
Put the eggs with the salt in the bowl of an electric mixer with a whisk attachment. Whip on high speed until thick - you are looking for the eggs to roughly double or triple in volume - approximately 3 minutes. Continuing to mix on high speed, slowly add the sugar in a steady stream. Whip for 2 minutes or until mixture is thick and ribbony. Now with a spatula fold in the lemon zest and vanilla (just until mixed). Sprinkle the flour on top of the egg batter, and gently fold in. Now fold in the butter mixture. Only stirring enough to bring everything together.
Spoon the batter into the molds, filling each mold 2/3 –3/4 full. I use a small cup filled with batter to keep things clean and manageable, it is easier than using a spoon.
Bake the madeleines for 12 - 14 minutes (7-10 minutes for smaller cookies), or until the edges of the madeleines are golden brown. Remove from oven and unmold immediately. Cool on racks and dust with powdered sugar.
Bake the madeleines for 12 - 14 minutes (7-10 minutes for smaller cookies), or until the edges of the madeleines are golden brown. Remove from oven and unmold immediately. Cool on racks and dust with powdered sugar.
(Makes 2 -3 dozen regular madeleines)
Sunday, January 20, 2008
Why I've Been Such a Culinary Dud
Let me tell you, Internet, what I've been up to so I can explain my lack of recipe postings. It is the start of a new year and my I'm-turning-30-this-year crisis is in full swing. Up until now, I've been really fine with the age thing. I still have my looks (or rather still get carded for drinks at bars) and get mistaken for being in college. So, that isn't the problem really. It's more that I'm almost 30 and feel like I don't have much to show for it. I do have a career (check); I am married (check); I have a house (check). See- this is what I do on a weekly basis to assure myself that I am ready to turn 30. My life is in a semi-chaotic order for 30. 30 is the new twenty. Ah...I digress...but, now you can see what is going on in this head of mine. I'm not thinking about what fabulous recipes I can cook, but rather going through neurotic conversations with myself.
Now, on top of all the neurotic-ism, I have been busy with other things too. I've had visits from friends, weekend trips, hosting holidays. I'm also now mulling over a new business venture with some great girlfriends, which will hopefully be starting soon. (I'll post more about this when I have more information.) But, speaking of these fabulous girlfriends, they will be guest bloggers on this site so I can spread the cooking/ recipe love. They have given me such great recipes in the past that I told them they must be a part of this. So, there's stuff to look forward to, dear Internet. Food and life are headed your way!
PS- My neurotic-ism will probably turn itself into a new blog site...that I do know.
Monday, January 14, 2008
Moving in the Right Direction
So, with 2008 in full swing, I must say that my cooking has not been. I've not only been completely uninspired, but also have been plain worn out. What do we eat home lately? Tacos, pizza, pasta (of sorts), turkey burgers, etc. Nothing of any merit to post on here.
However, just in the past few days I can start to feel the cooking urge slowly coming back. I got a BEAUTIFUL new madeleine cookie pan that is starting to feel a bit neglected. I think this may be the week folks!
However, just in the past few days I can start to feel the cooking urge slowly coming back. I got a BEAUTIFUL new madeleine cookie pan that is starting to feel a bit neglected. I think this may be the week folks!
Friday, January 11, 2008
Wednesday, January 2, 2008
Happy 2008!
So, I took a little break from this blog just to catch my breath and rethink how I want to tackle it in the upcoming new year. After a month of thought, I have reached no conclusion. Oh well!
A and I had a wonderful holiday filled with eating...lots of it. I must say that I know I'm getting older when after the holidays I actually GAINED weight. Yes, I was always one of those fortunate people who could eat and eat and not gain an ounce because of metabolism. Well, those days are over my friend and after-holiday diet is now a must. Oh, I'll still be cooking...but maybe just eating less. We'll see...
I am going to start posting recipes again as of tomorrow. I hope 2008 brings many tasty new things into my kitchen!
Subscribe to:
Comments (Atom)
